Import CSV (Databases) - Databases
Use the Import CSV option to import information from one or multiple CSV files into an Isis or ODBC database. You can use create a new Isis database with this option even if you do not have a pre-existing design.
If you use this option to import data into a pre-existing ODBC database, all existing data in the database will be overwritten.
This option performs minimal checking of data on loading, as it is assumed that the of data has come from an existing database where it was checked as part of the entry on that system. The checking that is performed consists of the following:
- Non-header records are removed if there is no header table for the data being loaded. However, other records in the table will be loaded if they are valid.
- Duplicate header tables are not loaded.
If further checking is required, then write the loaded database to a Database Listing file and then reload it using the dbdchk program.
This functionality is also available as an external executable through the ImportCSV program.
To use a V10.1 ISIS database in pre-V10.1 releases of Vulcan the database must converted to the ISIS (Legacy) database format using Utilities > Convert to Legacy Database found on the Isis menu, as shown below.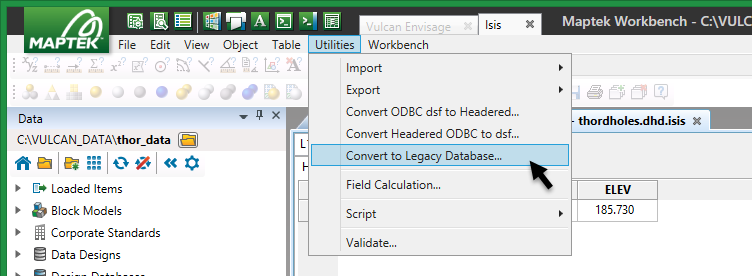
Instructions
-
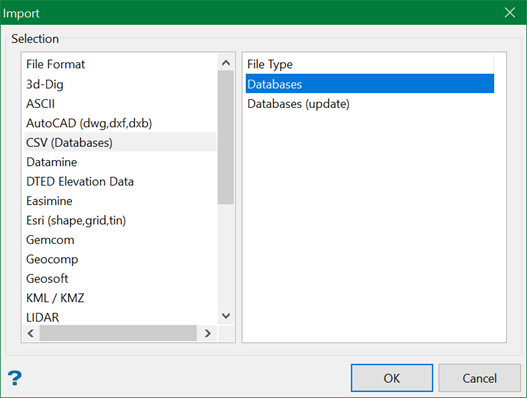
On the File menu, click Import to display the Import panel and click CSV (Databases) in the File Format column on the left.
-
Select Databases from the File Type field on the right side of the panel.
-
Click OK to display the Import CSV panel.
-
Expand below for instructions to configure the following settings:
 Open Specification
If you want to use an existing specification for the CSV import, select the specification from the CSV Import Specification drop-down list.
The
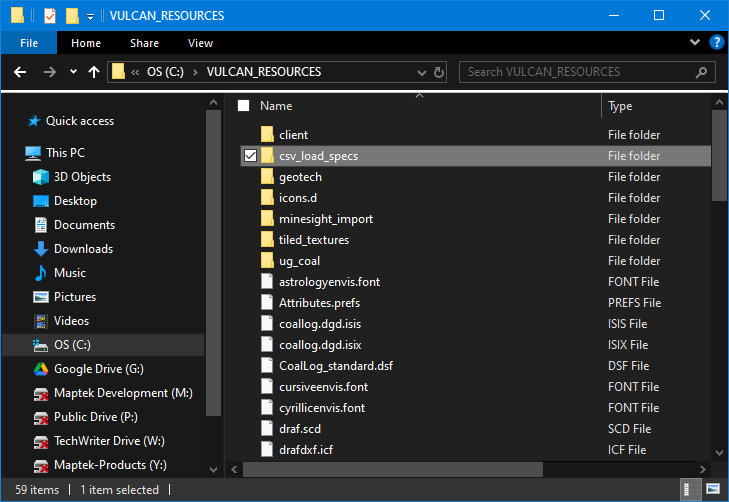
.csvimport specification file is located in the Vulcan Resources area which can vary depending on environment variable setup. In the resources folder, there is sub-folder calledcsv_load_specs. This folder contains the fileimport.csv.spec. You can view the contents of this file in a text editor. Although the specification file can be edited in a text editor, to delete a specification it is recommended to use the Delete button in the Import CSV panel.TipTo quickly locate the sub-folder
csv_load_specs, try this:-
On the File menu, click Run Command.
-
Enter the command:
start $ENVIS_RESO.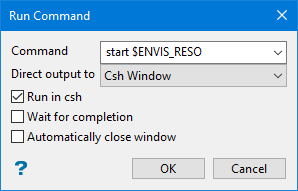
-
Set up the panel parameters as shown above, then click OK.
-
You should see the folder in the directory that is displayed.
To create a new specification, enter a name for the specification in the box. The name may include alphanumeric characters and underscores only. Other special characters are not allowed.
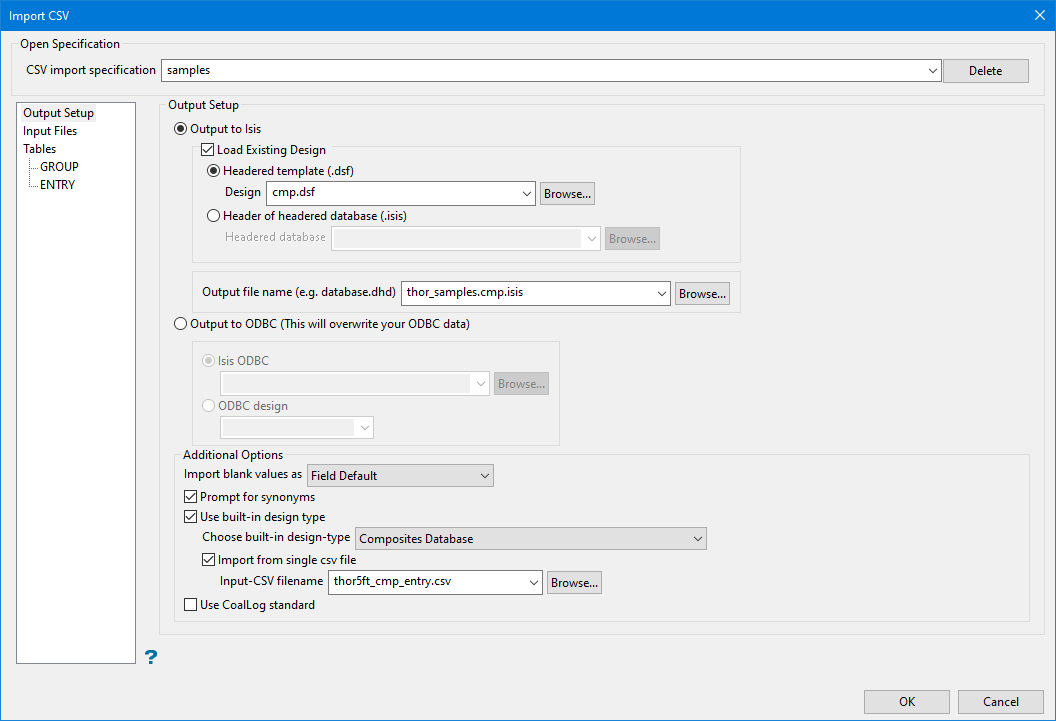
Output Setup
Select Output to Isis or Output to ODBC to specify the target database file type of your output.
If you select Output to Isis:
-
Select Load Existing design to load an existing design file, and specify the type of design file to use. Once the design is selected, the tables will be automatically displayed in the left panel under the Tables branch.
Note: Loading an existing design is optional for Isis databases.
-
Select Header of headered template (.dsf) if you want to use an existing headered template. If you select this option, select the template file from the Design drop-down list, or click Browse to select the file from another location.
-
Select Header of headered database (.isis) to use the header of an existing Isis database as the header for the new database. If you select this option, select the database from the Headered database drop-down list, or click Browse to select the file from another location.
-
Select the name of the output file from the Output File Name (e.g. database.dhd) drop-down menu or enter a new file name.
If you select Output to ODBC:
-
Select Isis ODBC to output the data to an Isis ODBC connection.
-
Select the Isis database name from the Isis ODBC drop-down list, or click Browse... to select a database from another location. Once the design is selected, the tables will be automatically displayed in the left panel under the Tables branch.
-
Select ODBC design to output the data to a regular ODBC connection.
-
Select the ODBC design name from the ODBC design drop-down list. Once the design is selected, the tables will be automatically displayed in the left panel under the Tables branch.
Additional Options
-
Import blank values as
Specify how blank CSV entries are to be treated in the Import blank value as drop-down list. You have the choice of inserting a null value into the database or using the default field value (as defined in the chosen design). If a default field value is blank or has not been set, a null value will be used by default.
-
Prompt for Synonyms
Select this option if you want to specify synonyms for drill holes before the file is imported. If you select this option, the Synonym Assignment panel displays before the CSV file is imported.
-
Use built-in design type
Select this option to import the data using either a composites database format or a samples database format. If you use this option, you will need to select the format using the Choose built-in design-type drop-down list.
-
Import from single csv file
Select this option to import the csv file using the fields found in a chosen CSV file. Select the CSV file using the Input-CSV filename drop-down list.
-
-
Use CoalLog standard
Select this option if you want to apply CoalLog formatting standards, which is the ability to print graphic logs with industry standard lithology patterns.
Vulcan is able to import and export data to and from the new CoalLog format. This data format has been developed in consultation with the Australian Coal Industry and has been finalised and taken up by the industry. A key component of compliance with the standard is the ability to produce graphic downhole traces of drilling logs, using CoalLog-compliant symbols/patterns specific to each rocktype - these are extensive in number and have been provided by the CoalLog project to industry software producers to facilitate easier uptake of this part of the project.
Input Files
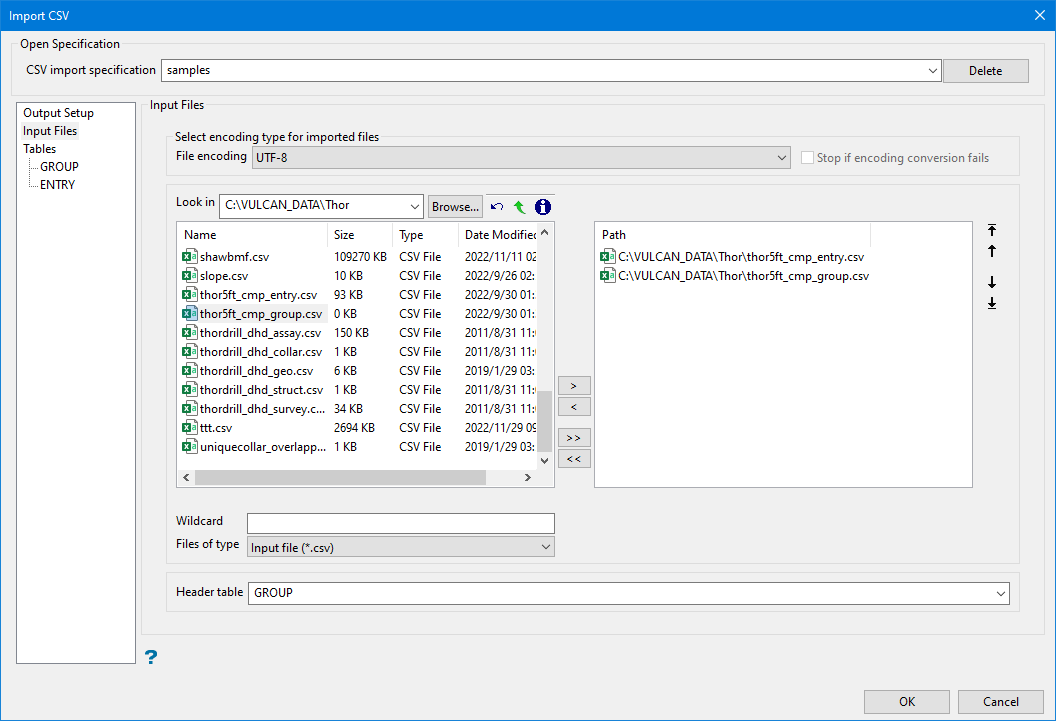
Select encoding type for imported files
-
Select one of the following from the File encoding drop-down:
- UTF-8
- Chinese Traditional
- Chinese Simplified
- Windows Encoding
Note: If an encoding other than UTF-8 is selected, the ASCII or CSV file will be converted to UTF-8 before being imported to Vulcan.
-
Select Stop if encoding conversion fails if you want the importing process to stop if an error occurs. If this option is not selected and the process fails, the importing process will continue with the original file.
-
Enter the file name or select the file from the drop-down. Click Browse to select a file from a different location.
-
Select the files that you want to import by clicking the arrow buttons between the columns to add the file names to the right column.
- To move a single file from one column to the other, click on the file name click the > or < button.
- To move a single file from one column to the other, click on the file name click the > or < button.
- To move a single file from one column to the other, click on the file name click the > or < button.
Once the files are selected, use the up/down controls on the right to reorder the selected files.
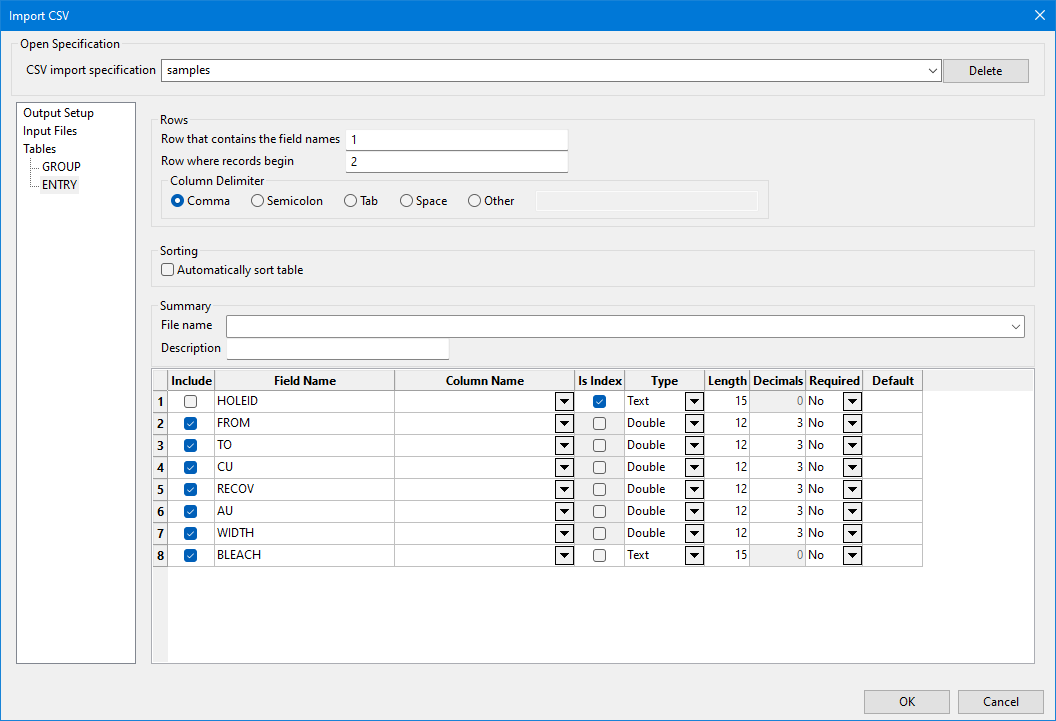
Tables
-
If you have loaded a pre-existing design, select the name of the CSV file to use for this table from the File Name drop-down list.
-
Enter the row number of the CSV file that contains the names of the fields in the Row that contains the field names box.
-
Enter the row number of the CSV file that contains the first field records in the Row where records begin box.
-
Select the type of delimiting character used in the CSV file in the Column delimiter that separates your fields section. If you select Other, enter the character in the box next to Other.
-
Enable Automatically sort table if the FROM and TO fields are not in order. When a drill CSV is imported with the FROM and TO depths out of order, the depths will be imported as is. Enabling this option will correct the order.
-
Review the following columns and make any necessary changes:
-
Select the Include checkbox to include the field in the database.
Note: If you are importing to an ODBC database, clearing the Include checkbox will not remove the field from you design. Rather, it will specify that null values will be loaded for those records.
-
Verify or modify the name in the Field Name field. If you are loading from a pre-existing design or importing to an ODBC database, do not modify the field name.
-
Select the name of the column in which the field information will be stored in the Column Name drop-down list. If you are loading from a pre-existing design or importing to an ODBC database, leaving the Column Name value blank will specify that null values will be loaded for those records.
-
Select the Is Index checkbox if you want use a field name as an index in the database. You can only select this option for a field if the selected field type in the Type column is Integer or Text.
-
Select the field type in the Type column. You can select Integer, Text, Single, or Double.
-
Enter the length of the field in the Length box.
-
If the field type is Single or Double, enter the number of decimals in the Decimals box.
-
Select Yes in the Required column to raise an error flag when essential data is missing and will cause drillholes to be placed incorrectly in 3D space.
-
If applicable, enter a default value for the field in the Default box.
-
-
Click OK to import the CSV files. If you selected the Prompt for Drillhole Synonyms checkbox on the Output Setup branch, the Synonym Assignment panel displays before the file is imported. If not, the file is imported and the database is created or updated as specified. See Database Elements for more information about Desurvey style.
-
