Projection
Use the Projection option to project a line, which has been designated as a fault, to a nominated level or grid mesh model.
Note: The line representing the fault needs to be displayed before using this option. The points on this line must also be in the grid mesh to have any affect when projecting to a surface.
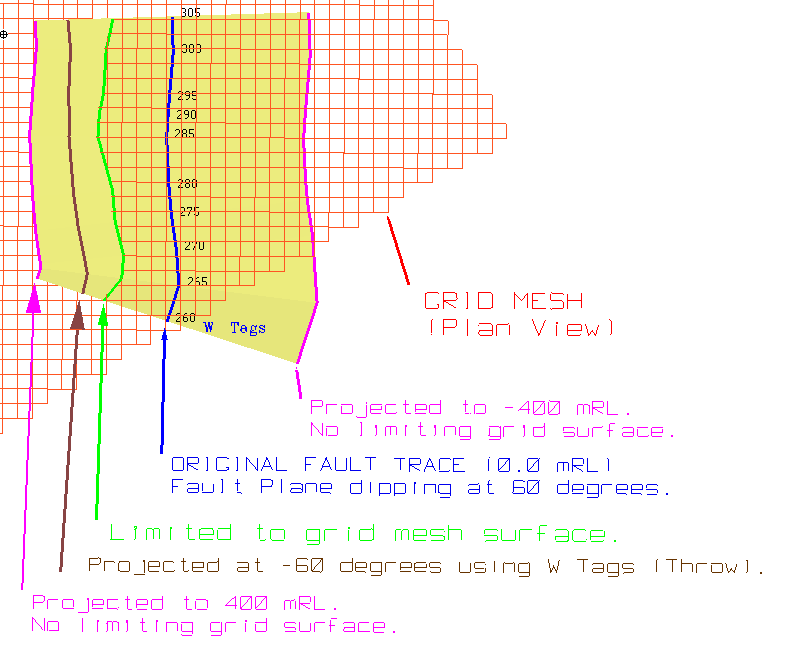
Figure 1: Projected fault lines
Instructions
On the Geology menu, point to Fault Manipulation, and then click Projection.
Select the fault (line) to project. Once selected, the following panel displays.
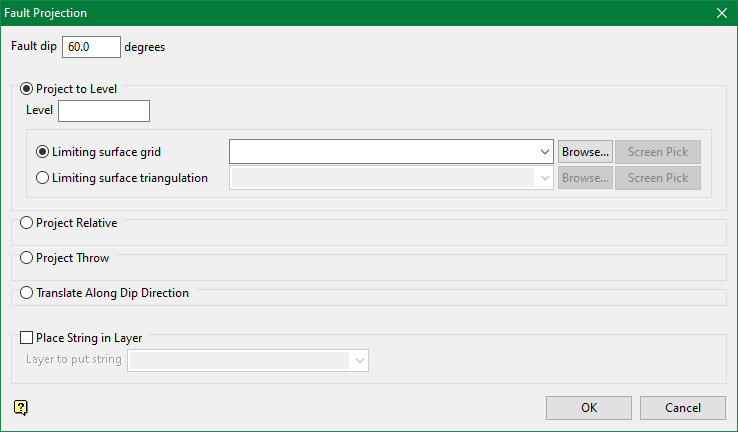
Fault dip
Enter the fault dip. The dip is from horizontal, and it is projected to the right with respect to the digitised sequence of the fault line. By default, the fault line will be projected perpendicular to the strike of the line. The fault line can be projected along the dip direction if the Translate along dip direction option is selected.
The fault line can be projected by using one of the following four methods:
Project to Level

Select this option to project to a specific level and/or a grid mesh surface. You will need to specify the level and limiting surface that you want to project to.
The surface name can either be entered manually, selected from the drop-down list, or picked from the screen. The drop-down list contains all grid models found in your current working directory. Click Browse to select a file from another location.
Project Relative

Select this option to project the fault line by a specific distance and/or the depth of a nominated thickness grid. You will then need to specify the relative distance (for example each point in the string may be projected downwards by 20.0 metres) and/or the thickness grid.
The thickness grid name can either be entered manually, selected from the drop-down list, or picked from the screen. The drop-down list contains all grid models found in your current working directory. Click Browse to select a file from another location.
Note: Positive values are up and negative values are down.
Project Throw

Select this option to project the fault line by the current W value. Use the Design > Point Edit > W Tag option to apply a W value to the string. If this option is selected, then the line will be projected downwards. Check the Project upwards check box if you want the line to be projected upwards.
Note: Downwards projects out to the left, upwards projects out to the right.
Translate Along Dip Direction
![]()
Select this option to project along the dip direction and/or to a nominated grid mesh surface or a triangulation. Projection along dip direction maintains the number and spacing of points, i.e. maintains the fault line integrity.
The surface grid or surface triangulation can either be entered manually, selected from the drop-down list, or screen picked. The drop-down list contains all grid models found in your current working directory. Click Browse to select a file from another location.
The direction of the projection can be specified by either two points or a dip direction.
Specify translation by digitising two points
Select this option to digitise the direction of projection. The first point is the strike reference point; the second point specifies the destination point.
Dip direction
Select this option to specify the direction of projection in degrees (0°-360°).
The fault line can be projected using one of two methods:
Project to Level
Select this option to project to an absolute level (elevation). The elevation can either be above or below the elevation of the selected fault line.
Project Relative Distance
Select this option to project by a relative distance. The specified distance can either be measured vertically from the selected fault line or measured along a specified grade. A positive value projects up from the selected fault line, a negative value projects down.
Place string in layer

Select this check box to store the projected string into a layer. If this check box is ticked, then you will need to specify the layer in which to place the string.
To create a new layer, enter the layer name. The layer name:
- may contain up to 40 characters.
- must begin with an alphanumeric character [0-9] or [a-z].
- cannot include spaces.
- can include hyphens [ - ], plus signs [ + ], underscores [ _ ], periods/dots [ . ].
- can include the special characters of ÁÂÃÀÇÉÊÍÓÔÕÚÜÑ that are used in the Spanish and Portuguese languages.
Click OK.
The fault line is then projected, and you will be asked whether to retain the projection. Once confirmed, you will then be asked to select another fault line to project.
