Volume
Calculate the Volume of a Solid Model
Use the Volume option to calculate the volume, tonnage and surface area of closed 3D triangulations. The volumes of up to 10,000 triangulations can be reported.
Tip: This option can also be accessed via the Vulcan context menu. Simply right-click on the highlighted triangulation(s) and select Volume from the displayed context menu. In order to access this option you will need to enable the Volume option under the Triangulation section of the Context Menu Customisation panel. Refer to the Tools > Context Menu option for more information on how to customise the Vulcan context menu.
Instructions
On the Model menu, point to Triangle Solid, and then click Volume to display the 3D Solid Volumes panel.
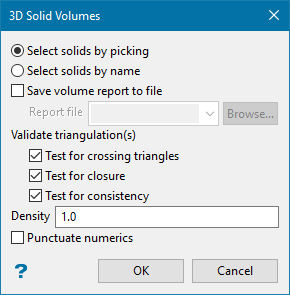
Select solids by picking
Select this option if you wand to pick the necessary triangulations from the screen. In order to use this option, the triangulations that you want to use must be loaded onto the screen prior to running the Volume option.
Select solids by name
Select this option to pick the necessary triangulations through using the standard Open panel.
The options shown above will not be displayed when you have accessed the Volume option via the Vulcan context menu.
Save volume report to file
Select this checkbox to output the calculated volumes to a nominated text file (.txt). To create a new report file, enter the file name and file extension. The resulting report file will be placed in your current working directory.
Validate triangulation(s)
The triangulation can be tested for crossing triangles, closure or topology consistency by ticking the appropriate check box. Refer to the Model > Triangle Utility > Check option for an explanation of the available tests. If there are any inconsistencies, then the calculated volume will be incorrect. You can use the Triangle Delete option to remove these inconsistencies.
Density
Specify a density value to calculate the tonnage along with the volume.
Punctuate numerics
Select this option to use comma separators in the output reports.
Click OK.
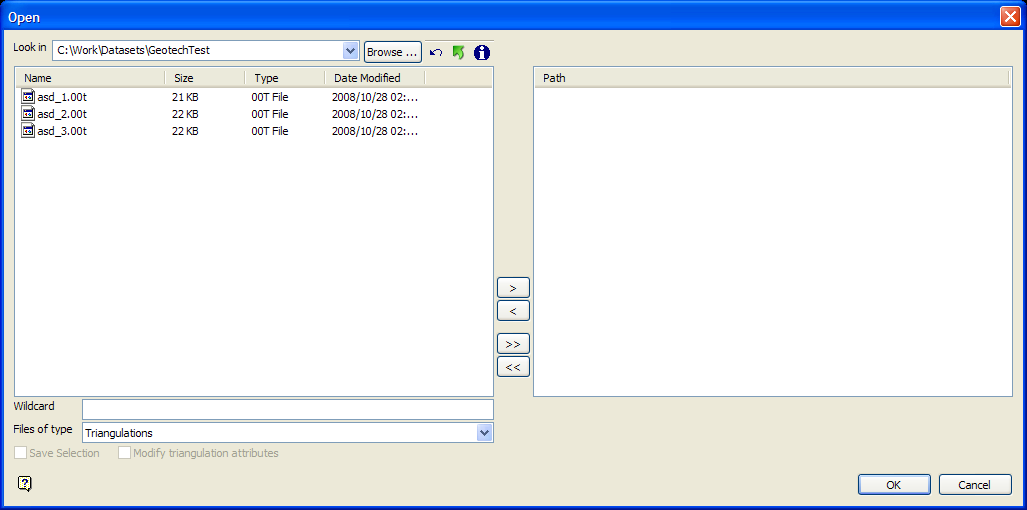
Select the necessary triangulation(s) from the screen. If you chose to use the Select solids by name option, then the standard Open panel displays instead.
File Selection
Browse for files using the Browse... button, or use the interface showing the available grid files in the current working directory.
Click on the names of the files you want to select. Use the  buttons to go to the last folder visited, go up one level, or change the way details are viewed in the window.
-
To highlight multiple consecutive files in the list, hold down the Shift key and click the first and last file names in that section of the list.
-
To highlight multiple non-consecutive files, hold down the Ctrl key while clicking the file names.
Move the items to the selection list on the right side of the panel.
-
Click the
 button to move the highlighted items to the selection list on the right.
 -
Click the
 button to remove the highlighted items from the selection list on the right.
 -
Click the
 button to move all items to the selection list on the right.
 -
Click the
 button to remove all items from the selection list on the right.
Wildcard
Enter the text to use as a filter, then press Enter. Use * for multiple characters or % to replace a single character.
Example: For example, with topo_* used as a wildcard, the result might be topo _area2_aerial, topo _min, or topo _with_pit.
Files of type
Use this to filter the file types that display in the search list.
Save Selection
Select this checkbox to save the selection list (the right-hand side of the Open panel), in a nominated selection file (.sel). Once this panel has been completed, the Save As panel displays.
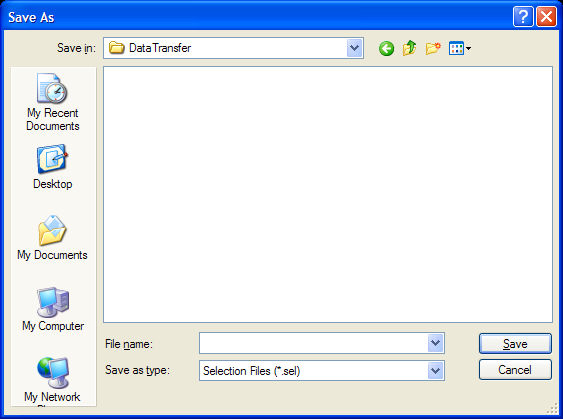
Select the file that will be used to store the triangulation selection list. To create a new file, enter the file name and file extension.
Modify triangulation attributes
Select this checkbox to modify the current display attributes for the selected triangulation files. This option is recommend if you do not want to use the display settings from a previous Vulcan session. Once this panel has been completed, the Triangulation panel displays. Altering a triangulation's display attributes updates the modification date stamp (date modified).
The Modify triangulation attributes checkbox is not applicable to triangulation files that are currently loaded on screen. Use the Model > Triangle Utility > Attributes option to modify a loaded triangulation's display attributes.
Click OK.
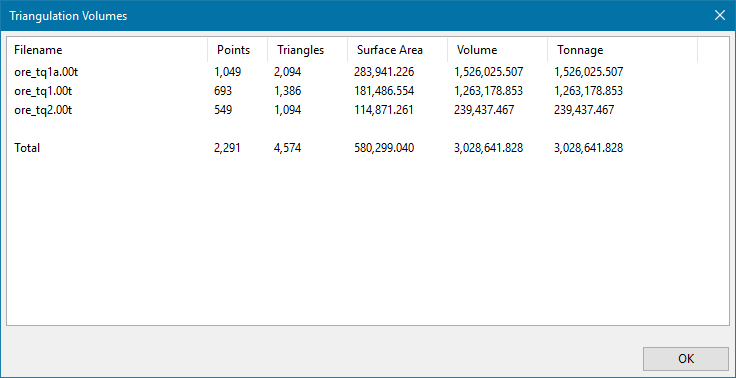
The calculated information displays in the Triangulation Volumes Window as well as the Report Window.
|
|
|
Figure 1: Triangulation Volumes Window |
|
|
|
Figure 2: Report Window Output |

