Normal Score Back 
Use the Normal Score Back option to use an existing Normal Scores transformation lookup table and transform the block model values that are in Gaussian units back to the original grade units.
This option can also be accessed by selecting the NScore Back button ![]() from the Gaussian Transformations toolbar.
from the Gaussian Transformations toolbar.
Instructions
On the Block menu, point to Gaussian Transformations, then click Normal Score Back.
![]()
Follow these steps:
-
Enter a name for the Specification file, or select it from the drop-down list. The drop-down list displays all files found in the current working directory that have the (
.bns) extension. Click the Browse icon to select a file from another location.
-
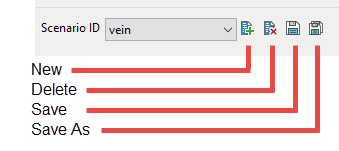
Select a Scenario ID. To create a new ID, click the New icon as shown below, and provide a unique name for the current panel settings.
-
Select the Block model from the drop-down list. Click the Browse icon
to select a file from another location. -
Select the Input Gaussian variable which are in Gaussian units. The transformed values will be stored in the specified Output Grade variable.
Multiple pairs can either be defined manually or defined by clicking the Set names button.
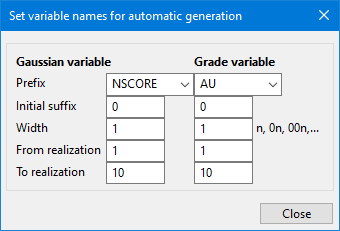
TipClicking the Set names button will cause the Set variable names for automatic generation panel to be displayed.
-
Enter a Prefix for the base name of the Gaussian variable.
-
Enter an Initial suffix to be used as the starting number for each variable name.
-
Enter the minimum Width for the suffix. For example, if the width is '3', and the initial suffix is '1', then the complete first suffix will be '001'.
-
Set the starting and ending From realisation / To realisation indices. These fields are used to establish the number of variables names that will be automatically filled in the Block Model Variables Selection grid.
-
Click Close to return to the Block Model Normal Score Back Transformation interface.
-
Click the Generate button to create the variable names using the definitions setup on the Set variable names for automatic generation panel.
-
The Clear button will remove the variable names from the grid.
-
-
Enable Create block model output grade variables if the variables listed in the grid do not already exist in the block model. Select the numeric type for the new variables by choosing either float or double.
-
Select the Transformation table that will be used to transform the existing Gaussian values. The name of the transformation table can either be manually entered or selected from the drop-down list.
-
Enter the Minimum value to be used in the distribution. This value should be less than the smallest cut-off.
-
Enter the Maximum value to be used in the distribution.
-
Select a model for each section of tail attribute using the drop-down lists.
Power model for left tail - This describes the shape of a curve from the Minimum data value to the lowest cut-off. If this value is less than 1, then the distribution is skewed towards the minimum data value. If it is greater than 1, then the distribution is skewed towards the lowest cut-off. If it is equal to 1, then the distribution is flat from the minimum data value to the lowest cut-off.
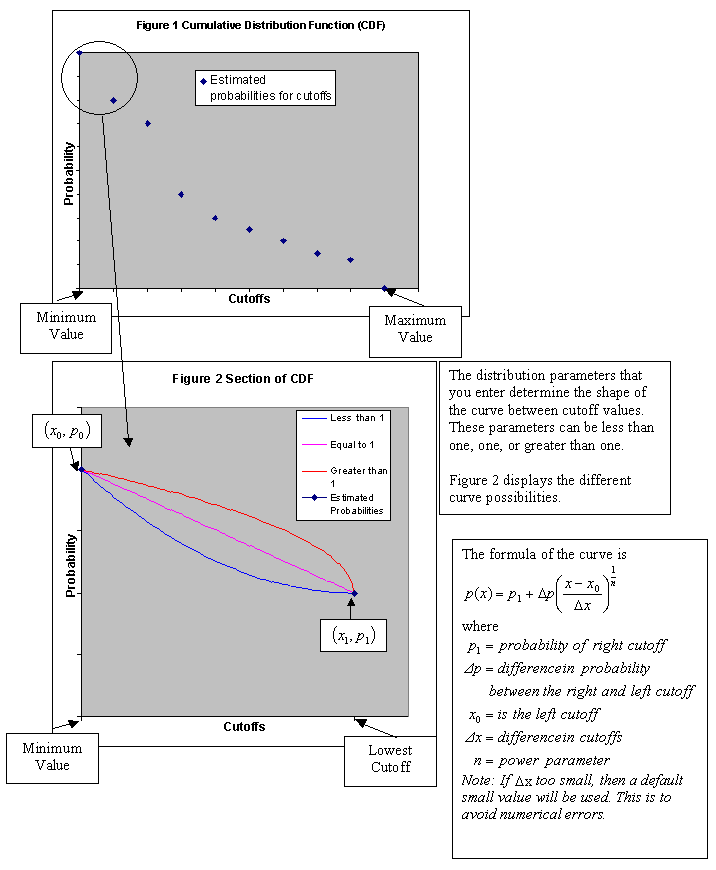
Power model for right tail - This option gives a distribution with a maximum data value. The maximum data value should be larger than the highest cut-off. The power for the right tail curve controls the shape of the distribution above the highest cut-off. If the power is less than 1, then the distribution is skewed towards the highest cut-off. If the power is greater than 1, then the distribution is skewed towards the maximum data value.
Block Selection
![]()
Use this panel to set up various block selection options.
Select any of the options to limit the blocks used.
Select this checkbox to limit the estimation to those blocks where a specified variable equals a certain value. Both the variable and the value are forced to be lowercase.
Select this checkbox if you only want to apply a condition to the blocks to be estimated. A single condition can contain up to 132 alphanumeric characters. For a condition to contain more than 132 alphanumeric characters, you will need to manually edit the (.bef) file. Refer to Appendix B of the Vulcan Core documentation for a list of available operators/functions.
Select this checkbox to restrict the estimation to those blocks whose centroids lie within a specified range of co-ordinates. Enter the minimum and maximum co-ordinates (in the X,Y and Z directions). These co-ordinates are offsets from the origin of the block model (that is, block model co-ordinates).
Select this checkbox to limit the estimation to those blocks that lie within a specific solid triangulation. The triangulation name can either be manually entered or selected from the drop-down list. Click Browse to select a file from another location. You can also select loaded triangulations from the screen by clicking the Pick Screen option.
Click Apply and Run to begin the transformation . This will save your settings in to the Normal Score specification file (.bmn) and start the transformation run.
Click OK to save your settings to the Normal Score specification file (.bmn) without running the transformation.
Click Cancel to close the panel without saving any settings.
