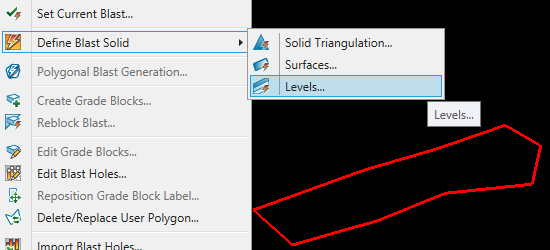
Define Blast Solids
Levels
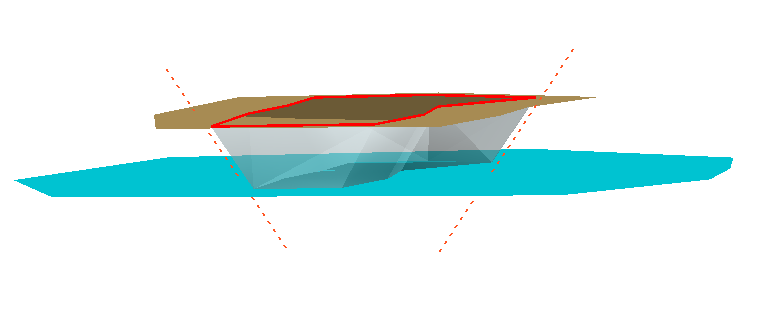
Select a region using two surface triangulations and a polygon.
Initially, this menu item is deactivated unless there is a new blast has been created and needs to be defined.
Create a new blast by clicking New Blast, then follow the prompts. For additional information see New Blast.
Instructions
On the Grade Control menu, point to Define Blast Solids, then click Solid Triangulation.
A polygon defining the blast area needs to exist before using this option.
-
Select the polygon that defines the border of the blast.
-
Complete the selections on the Blast-Solid Boundary Options panel, then click OK.
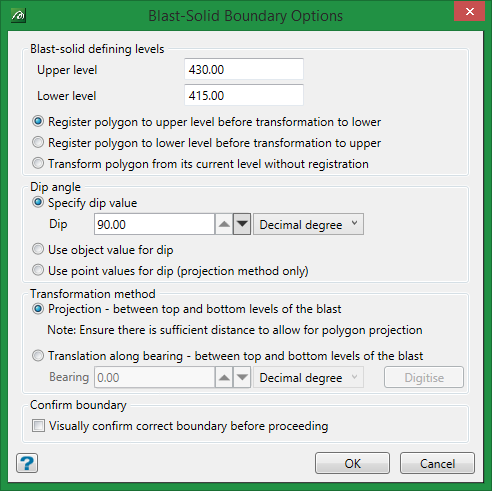
Defining the upper and lower levels
Enter the elevation for the upper and lower levels.
Register polygon to surface
Select whether to register the polygon to the upper surface, the lower surface, or to continue without registering it to either surface. With a dip angle of 90 degree (straight up) registration will not make a difference. However, if the dip is at an angle other than 90 degrees, then the aerial offset could be significant depending on the distance the polygon is above the surface. In such cases, we recommend registering the polygon to the surface.
Dip angle
Specify dip value
Select this option to customise the dip angle. By default, it is set at 90 degrees.
Use object value for dip
The object value can be used for the dip. If you have lot of blast patterns, assigning the object value as the dip angle for each can save a lot of time.
Use point values for dip
Select this option to use the point values for the dip. Follow these steps to use point values for dip:
-
After you have digitised your polygon, set the W tags at each point to the desired batter angle by using Design > Point Edit > W Tag. (See W Tag .)
-
Next, set the batters using Open Pit > Open Cut Design > Assign Berm/Batter Values. (See Assign Berm/Batter Values .)
Transformation method
Projection
Translation
![]()
Confirm boundary
Selecting this option will generate a boundary wall showing the extents of the model, allowing you to accept or reject it before continuing.
