Import Surpac Data
Note: Currently, Vulcan can import Surpac files exported as ASCII files only. However, Surpac exports both text and binary files. Please note that import of .str and .dtm binary files are not supported because Vulcan will not import the binary files.
Instructions
On the File menu, click Import to display the Import panel.
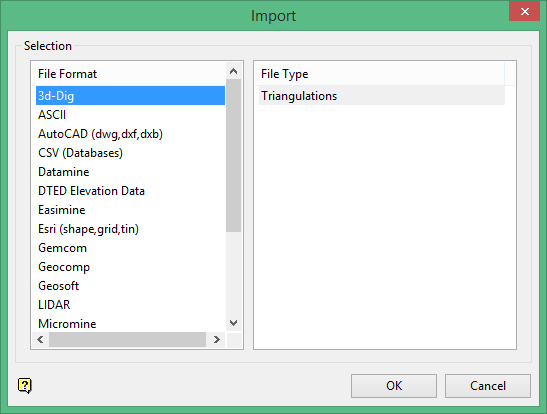
Click Surpac in the File Format column on the left.
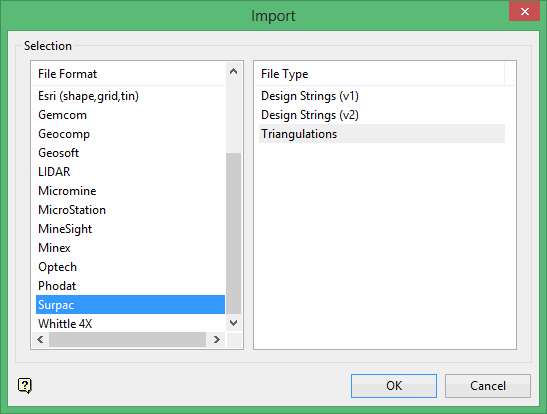
Select Design Strings (v2) from the File Type field on the right side of the panel.
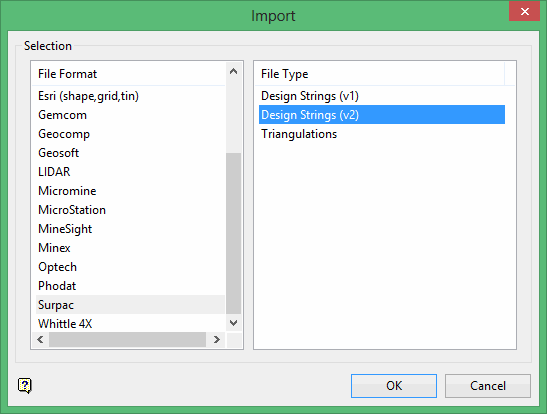
Click OK to display the Import Surpac2 String panel.
Selection tab
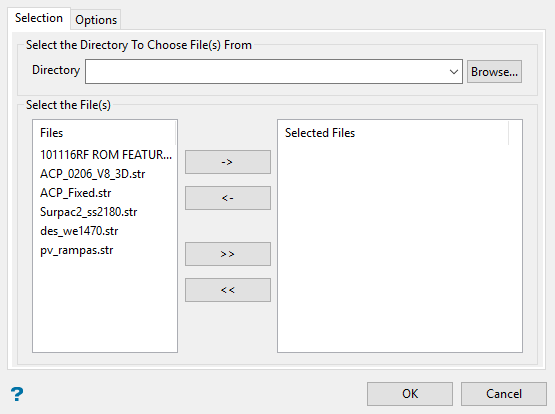
Select the Surpac files (.str) that you want to import. The chosen files must contain two header records.
To highlight multiple list items at once, use the left mouse option in combination with the Shiftkey (this is for items that are adjacent in the list; for non-adjacent items, use the Ctrlkey and the left mouse option).
Move the items to the selection list on the right side of the panel.
- Click the
 button to move the highlighted items to the selection list on the right.
 - Click the
 button to remove the highlighted items from the selection list on the right.
 - Click the
 button to move all items to the selection list on the right.
 - Click the
 button to remove all items from the selection list on the right.
Options tab
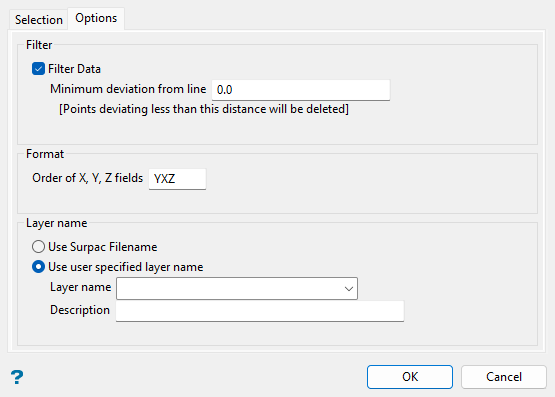
Filter
Filter Data
Select this check box to reduce the number of points being imported. The points are filtered according to the specified variation (deviation). Refer to Design > Object Edit > Filter for more information on filtering excess points.
Format
Order of X, Y, Z fields
Enter the order of the X, Y, Z fields in the Surpac file, for example XYZ, YXZ, ZXY, etc.
Layer name
Use Surpac Filename
Select this option to store the imported string data in a layer that is named after the chosen Surpac file. A default description of "Created layer <date><time>" will be assigned.
Use user specified layer name
Select this option to store the imported string data in a nominated layer. The drop-down list contains the names of all layers found in the currently open design database. If you select an existing layer, then the resulting data will be appended to the nominated layer. If you enter the name of an existing layer that is not currently loaded, then you will need to confirm whether you want to load the layer or replace it, that is overwrite its contents.
To create a new layer, enter the layer name. The layer name:
-
may contain up to forty characters.
-
must begin with an alphanumeric character [0-9] or [a-z].
-
cannot include spaces.
-
can include hyphens [ - ], plus signs [ + ], underscores [ _ ], periods/dots [. ].
-
can include the special characters of ÁÂÃÀÇÉÊÍÓÔÕÚÜÑ that are used in the Spanish and Portuguese languages.
You will also have the ability to assign a description to further describe the contents of this layer. The maximum size is 80 alphanumeric characters (spaces are allowed). If a description is not entered, then the default "Created layer <date><time>" will be used instead. If the chosen layer already has an assigned description, then this displays when the layer is selected. Existing layer descriptions can be overwritten.
Click OK.
A dialog then opens where you can select description values from the Surpac file columns and assign applicable values to the subject layer’s object name, point name, and W field, as desired.
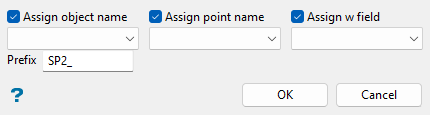
The available drop-down lists display the description values (fields in addition to X, Y, Z) of the first record in the Surpac file, listed in order of columns as they appear in the data. If the first record does not contain data for description values, review the file contents to decide which fields to assign.
Assign object name
Select this check box to import an alphanumeric field to assign to the object name. Select the desired alphanumeric field from the drop-down list, which displays the available description values in order for the first record of the Surpac file.
Enter a string in the Prefix field to be used for the object name, as desired. You can also leave the default string prefix, or clear the field and no prefix will be used.
Assign point name
Select this check box to import an alphanumeric field to assign to the point name. Select the desired alphanumeric field from the drop-down list, which displays the available description values in order for the first record of the Surpac file.
Assign w field
Select this check box to import a numeric field to assign to the w field. Select the desired numeric field from the drop-down list, which displays the available numeric description values in order for the first record of the Surpac file.
Click OK to import the Surpac file data to the specified layer.
Note: If you selected multiple Surpac files to import, the dialog to select description values will reopen to assign values for each file.
