Import Esri Shape File Data
Note: If you are exporting or importing triangulations to or from ESRI, you need to have ArcGIS 10+ with the Analyst module installed and licensed to the same computer that is licensed to run Vulcan.
Instructions
On the File menu, click Import to display the Import panel.
Click Esri (shape,grid,tin) in the File Format column on the left.
Select Design Strings from the File Type field on the right side of the panel.
Click OK to display the Import Shape File panel.
Each shape file consists of a main file (.shp), an index file (.shx), and a database table (.dbf). The main file is a variable-record-length file where each record is a list of vertices that describe a shape. Each record of the index file contains information about the distance the corresponding main file record is from the start of the main file. The database table comprises of feature attributes with one record per feature. All three files have the same prefix. To import shape files, all three files must be located in the same directory.
Selection tab
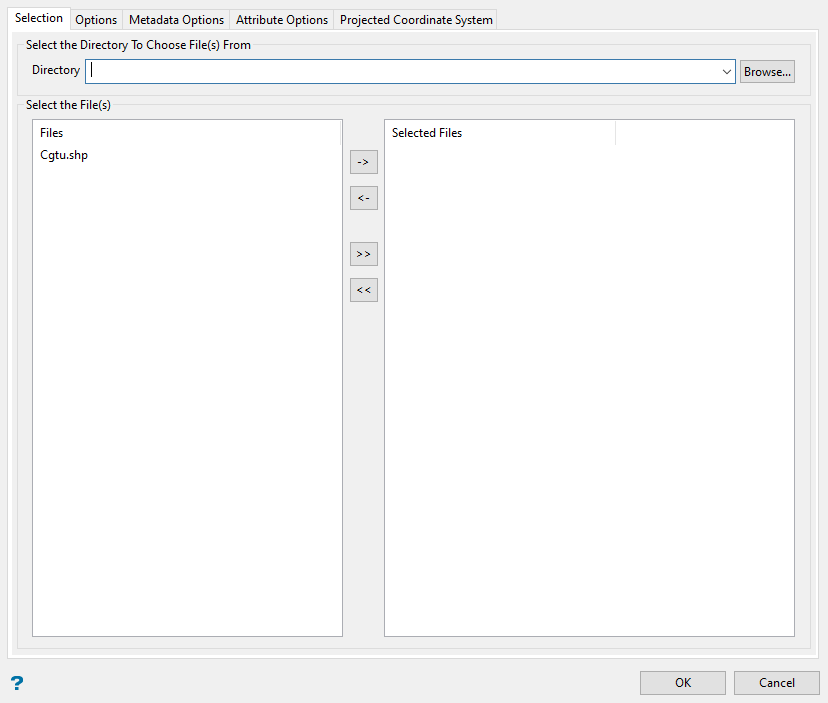
Select the Esri Shape files (.shp) that you want to import.
- To move a single file from one column to the other, click on the file name click the > or < button.
- To move all files from one column to the other, click the >> or << button.
- To move multiple files from one column to the other, hold the Ctrl key while clicking on the file names (or hold the Shift key to select a group of adjacent files). Once all the desired files are selected, click the > or < button.
Options tab
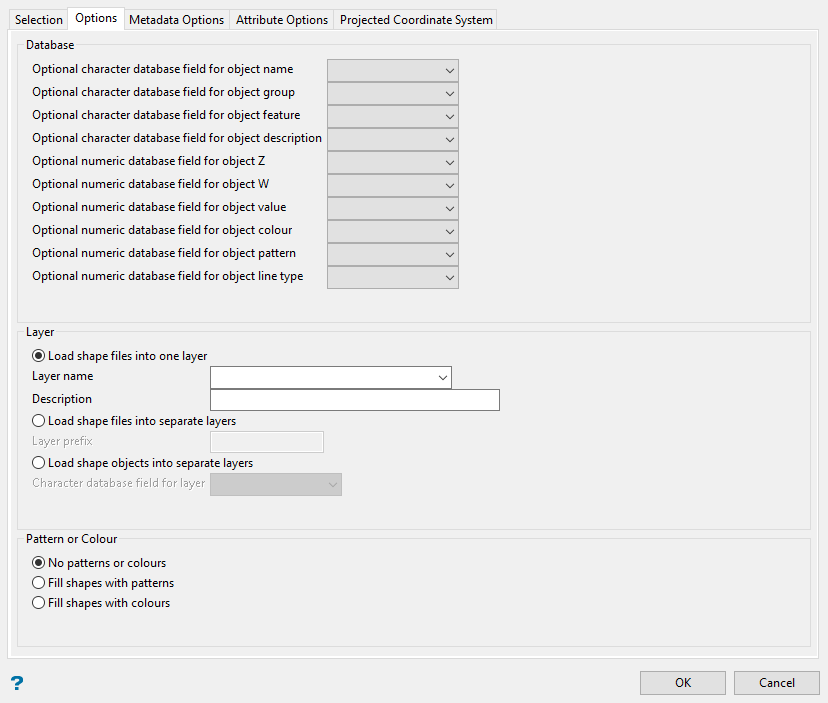
Load shape files into one layer
Select this option to load the shape files into a single layer. The drop-down list contains the names of all layers found in the currently open design database. If you select an existing layer, then the resulting data will be appended to the nominated layer. If you enter the name of an existing layer that is not currently loaded, then you will need to confirm whether you want to load the layer or replace it, that is overwrite its contents.
-
May contain up to forty characters.
-
Must begin with an alphanumeric character [0-9] or [a-z].
-
Cannot include spaces.
-
Can include hyphens [ - ], plus signs [ + ], underscores [ _ ], periods/dots [ . ].
-
You will also have the ability to assign a description to further describe the contents of this layer. The maximum size is 80 alphanumeric characters (spaces are allowed). If a description is not entered, then the default "Created layer <date><time>" will be used instead. If the chosen layer already has an assigned description, then this displays when the layer is selected. Existing layer descriptions can be overwritten.
Load shape files into separate layers
Select this option to load the shape files into separate layers. You can specify a layer prefix, which will be added to the shape file name to create the layer name. This name will be truncated to forty alphanumeric characters.
Leave the layer name/prefix field blank if you want the resulting layer(s) to be named after select shape files. The layer name(s) will be truncated to forty alphanumeric characters if necessary.
Load shape objects into separate layers
Select this option to load the shape objects into different layers. You will need to specify the character database field for the layer. In this way you can load objects with different names, groups, features or layers into different layers.
If the field you want to use to name the layers is numeric (rather than a character field), then you will need to adjust the database. For example: you might be able to add a character field that contains the information from the numeric field.
Optional character and numeric database fields
Use these fields if you have information in the database (shape files) that you want to enter in the object name, group, feature, description, Z and W values. Enter, or select, the character or numeric, database fields for object name (character), group (character), feature (character), description (character), object Z (numeric), object W (numeric), value (numeric), colour (numeric), pattern (numeric) and line type (numeric).
No patterns or colours
Select this option to display the objects with no patterns or colours.
Fill shapes with patterns
Select this option to apply a fill pattern to the shapes.
Fill shapes with colours
Select this option to apply a fill colour to the shapes.
With the Fill shapes with patterns and Fill shapes with colours options, if the numeric database fields for colour and pattern are left blank, then the pattern and colour used will be the default colour and pattern (set through the Status toolbar).
Metadata Options tab
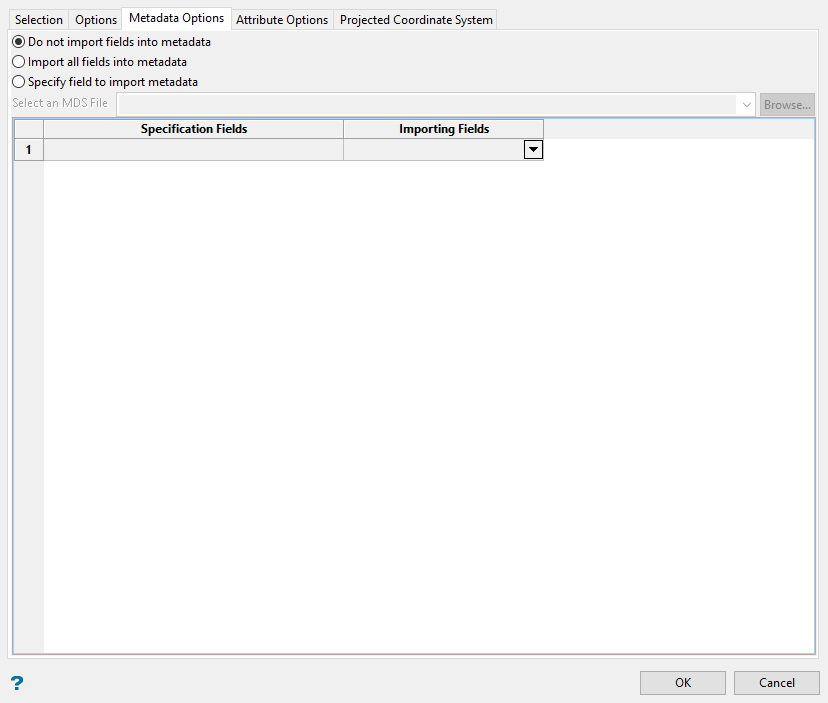
Use this section to specify whether or not the imported fields are to be made accessible to the Design > Metadata submenu.
Do not import fields in metadata
Select this option if you do not want to use the imported fields with Vulcan's Metadata module.
Import all fields into metadata
Select this option to import the shape file data and it's associated metadata fields without using a Metadata specification file (.mds).
Specify field to import metadata
Select this option to associate the imported data with metadata fields stored in an existing Data specification file (.mds). The drop-down list contains all .mds files found in your current working directory.
Click Browse to select a file from another location.
Once a specification file has been chosen, you will need to select an import field for each available metadata field stored in the nominated specification file. The import fields are selected from the drop-down list.
Attribute Options tab
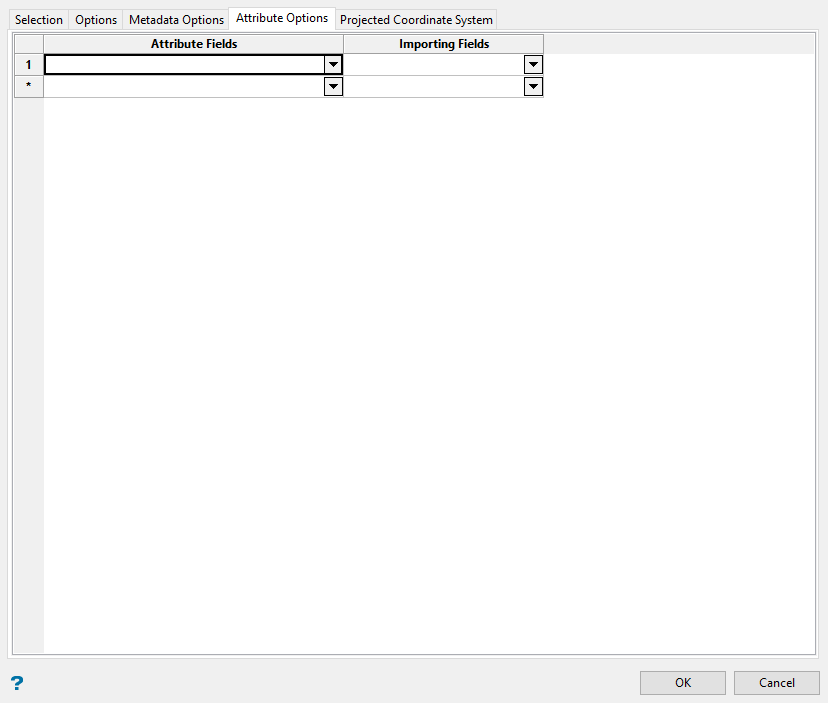
Attribute Fields
This column relates to the Templated Attributes. Prior to importing the shape file, users are required to create an attribute template if they want to import attributes as well. Once an attribute template is created and saved in the same directory, it is automatically populated and you can select the attribute from the drop-down list.
Importing fields
These are the attributes coming from the shape file. Select one from the drop-down list.
Click OK.
The shape files are then imported and displayed on the screen. You may need to use the  Zoom Data Extents button (on the Graphics toolbar) in order to see the data.
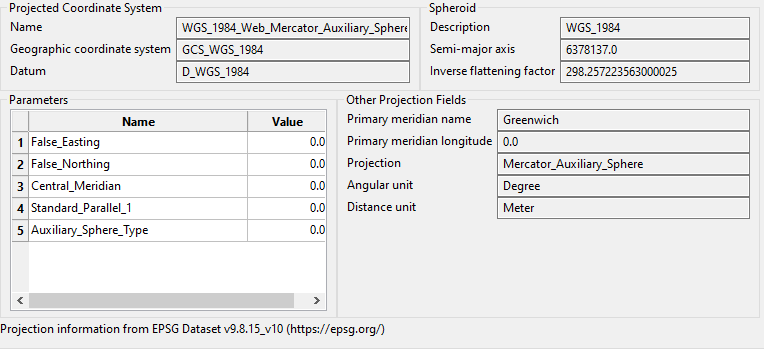
Projected Coordinate System Tab
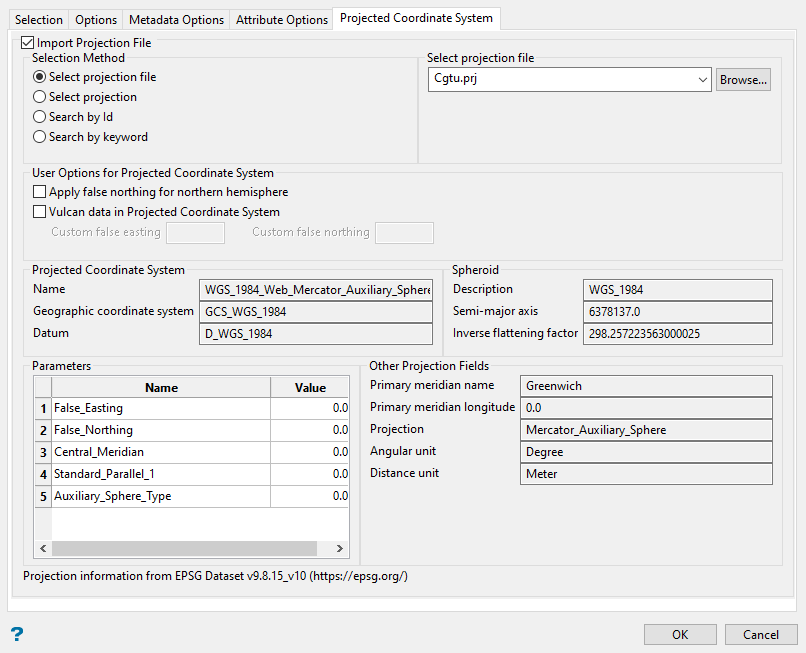
Import Projection File
This allows you to set up parameters for a file containing coordinate system information in the format of a (.shp) file.
The information on this pane is automatically filled in based on your inputs for the selection method.
Selection Method
-
Select Projection File

Select the (
.prj) file from the drop-down list.
-
Select Projection

Select your options by using the drop-down lists.
-
Search by ID

Enter the project ID, or search for it by clicking the Search button.
-
Search by keyword

Enter a keyword fro the search projection, or search for it by clicking the Search button. Then select the projection using the drop-down list.
Apply false northing for northern hemisphere
Enable this option to allow a false northing value to be used. Normally the false northing is only applied for the southern hemisphere.
Vulcan data in Projected Coordinate System
Enable this option to allow custom false easting and false northing values to be used by the projection file.
The remaining information on the panel is display only and cannot be edited.