Import Surpac Data
Note: Currently, Vulcan can import Surpac files exported as ASCII files only. Please note that import of *.strand *.dtm files are not supported. However, Surpac exports text and binary files. Vulcan does not import the binary files.
Instructions
On the File menu, click Import to display the Import panel.
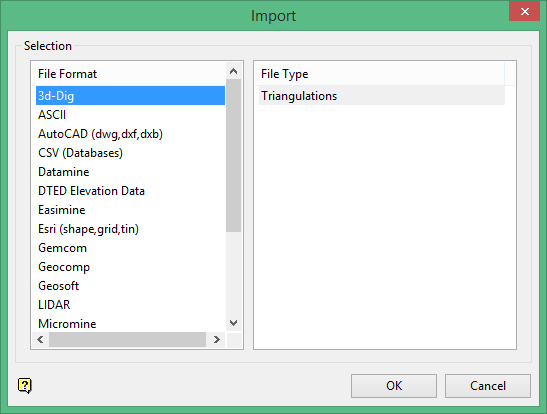
Click Surpac in the File Format column on the left.
Select Design Strings (v1) from the File Type field on the right side of the panel.
Click OK to display the Import Surpac1 String panel.
Selection tab
Select the Surpac files (.str) that you want to import. The chosen files must contain two header records.
To highlight multiple list items at once, use the left mouse option in combination with the Shiftkey (this is for items that are adjacent in the list; for non-adjacent items, use the Ctrlkey and the left mouse option).
Move the items to the selection list on the right side of the panel.
- Click the
 button to move the highlighted items to the selection list on the right.
 - Click the
 button to remove the highlighted items from the selection list on the right.
 - Click the
 button to move all items to the selection list on the right.
 - Click the
 button to remove all items from the selection list on the right.
Options tab
Format [string number, Y, X, Z]
Enter the Fortran format statement indicating the position of the data in the file. Vulcan expects one string number (a 3-character integer) and three real numbers. Records with a string number of '99' are not imported.
The first of the three real numbers represents the location of the Y coordinates, the second represents the location of the X coordinates, and the last represents the location of the Z coordinates. The Fortran format statement, which must be enclosed in brackets, can contain up to forty alphanumeric characters.
Refer to Appendix D for a list of all the fields that are supported in a Fortran format statement.
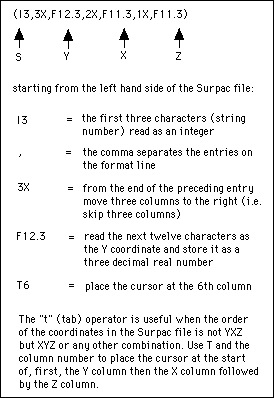
Figure 1: Fortran format statement
String ID prefix
Enter the string prefix to be used. If desired, leave the default string prefix, or clear the field - no prefix will be used.
Point data
Select this check box if you want the data to be imported as points rather than connected lines.
Filter data
Select this check box to reduce the number of points being imported. The points are filtered according to the specified variation (deviation). Refer to the Design > Object Edit > Filter option for more information on filtering excess points.
Close strings
Select this check box if you want the strings to be automatically closed.
Click OK.
