Route Combinations
This option provides a tool which allows validation of the route generated.
Instructions
On the Open Pit menu, point to Haulage Profile, then click Route Combinations.
Follow these steps:
-
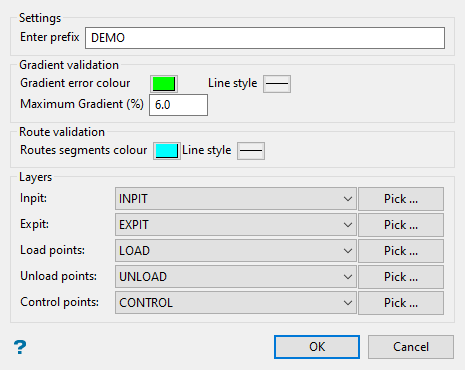
Enter the prefix you want to attach to all the associated files that will be generated when this option is run. One or more (
.pac) files and an optional excel spreadsheet will be produced. -
Select a Gradient error colour and line style by clicking on either of the two icons. The sections of the polylines where the gradient threshold is exceeded will be identified using this setting.
-
Set the Maximum Gradient (%) in the space provided. This will be your gradient threshold.
-
Set the colour for Route validation using the icons labelled Routes segment colour and Line style. This will highlight the segments of the various routes that are being evaluated.
-
Assign the layers to use in the evaluation using the drop-down lists, or pick them from the screen by clicking on the Pick button.
Layer Purpose Inpit Section of road used to enter the pit area. Expit Section of road used to exit the pit area. Load points Point showing location where trucks are loaded. This is the start of the route. Unload points Point showing location where trucks are dumped. This is the end of the route. Control points These indicate the zones corresponding to gear changes, at the beginning of the route, switchbacks, and before reaching an unloading zone. -
Click OK to advance to the next panel.
-
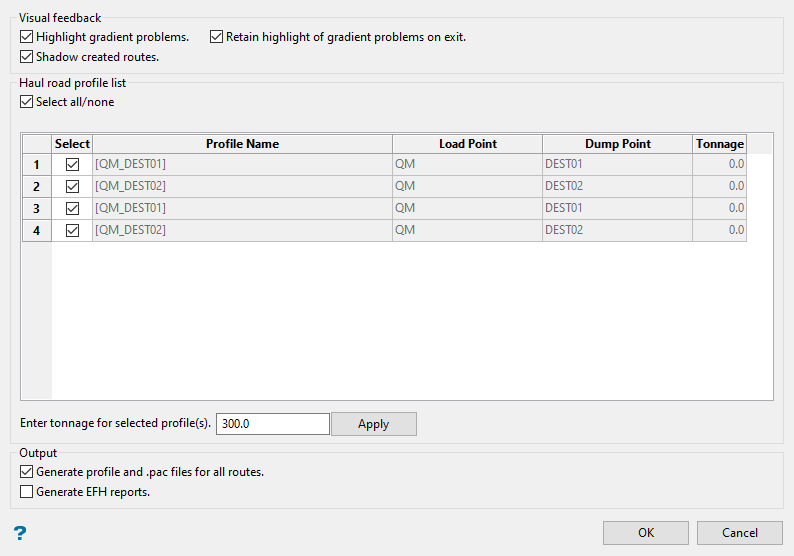
Select the type of Visual feedback you want to see.
Visual feedback Result Highlight gradient problems Highlights the segments of the route where the gradient exceeds the grade threshold. Shadow created routes This option will render the routes in a shadowed effect instead of rendering them in full visibility. See View > Visibility > Shadow for more information. Retain highlight of gradient problems on exit Displays the segments of the route where the gradient exceeds the grade threshold after the option has closed. -
Select the routes you want to evaluate. You can select them individually or by enabling the Select all/none checkbox.
-
Enter the estimated tonnage for each profile, then click the Apply button. The tonnage will be applied to every route profile that has the Select checkbox enabled.
Note: You do not need to apply the same tonnage to every route.
-
Select the output you want to generate.
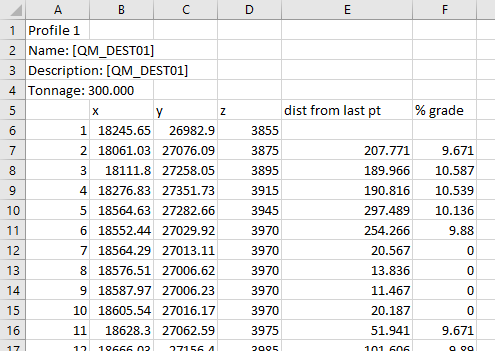
Generate profile and .pac files for all routes will produce files with the format:
[index, x, y, z, control number]Generate EFH reports will produce an Equivalent Flat Haul report.
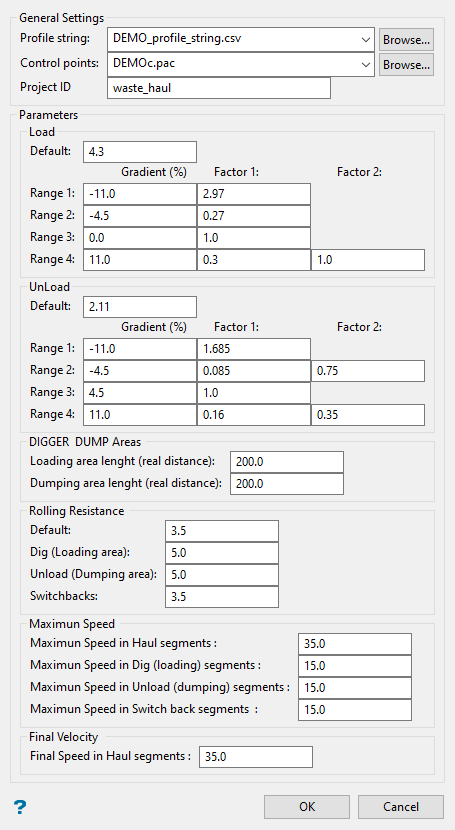
If you select Generate EFH reports, then a secondary panel will be displayed showing the parameters for the report. By default, the parameters are already filled in. However, you can edit each of the parameters if you wish.
The only parameter that is not filled in by default is the Project ID.
-
Click OK to run.
Results
A CSV file showing the results will be saved to your working directory.