Walls Mapping
Creates a Section view to allow the cross section-view mapping of underground geological information in the walls of the drive. It also creates incremented measurements away from a given reference point.
Instructions
On the Face Mapper menu, point to Mapping, then click Walls Mapping.
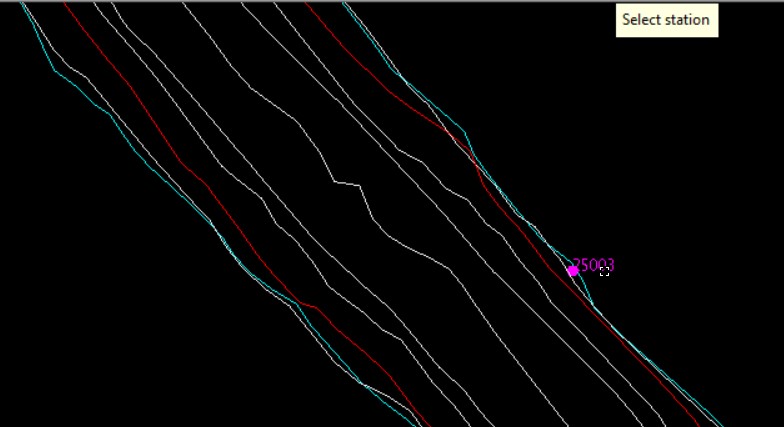
When running the Walls Mapping tool the user will first be prompted to select a survey station (or user defined reference point) – this will be used as the reference point from which measurement marks will be calculated and created.
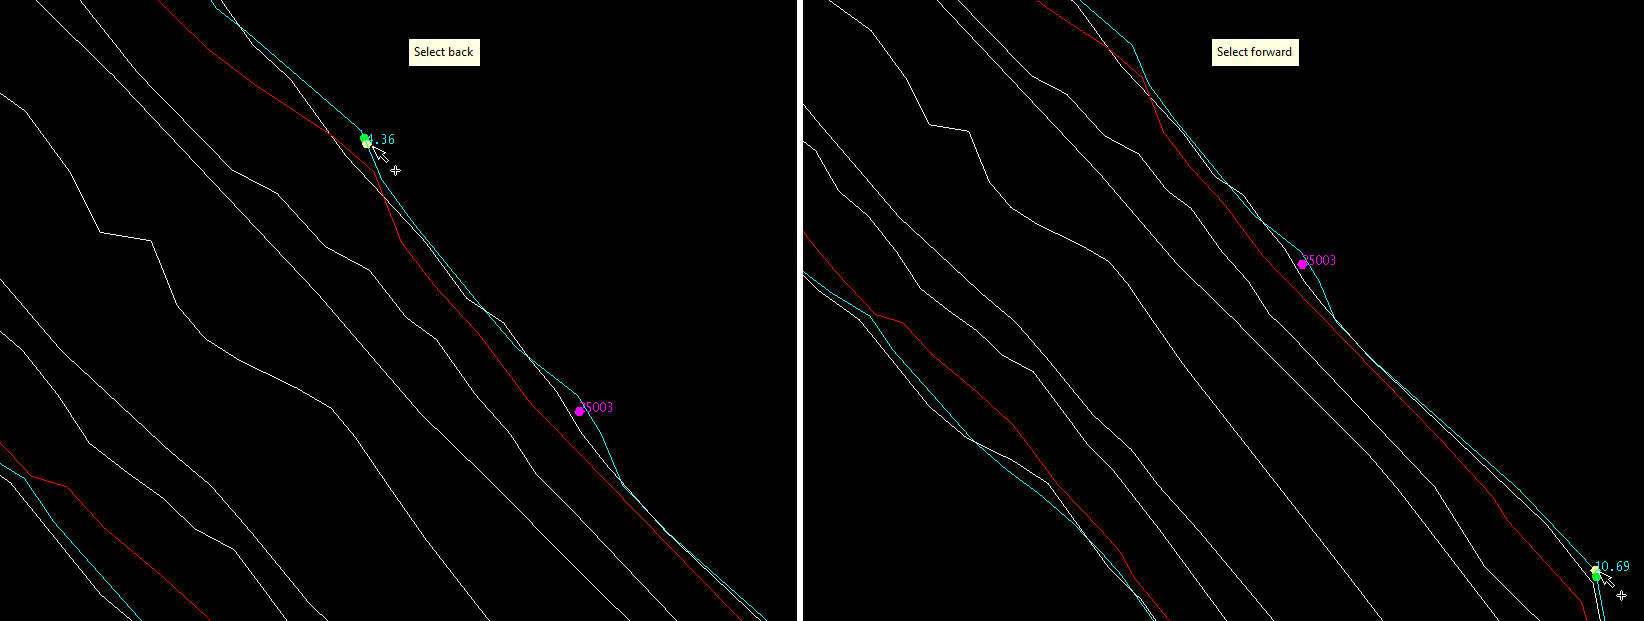
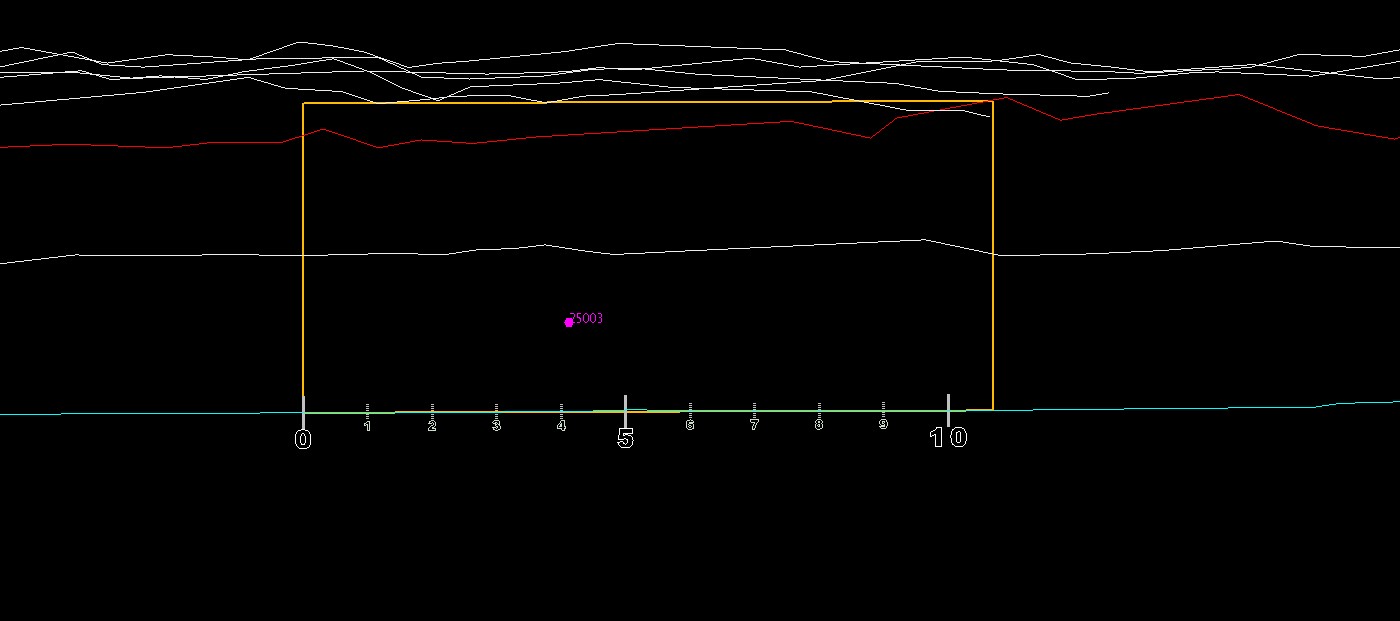
The user will then be prompted to digitse the back point (i.e. the furthest point backwards, this is the starting point) and forward point (i.e. the furthest point forwards, this is the end point) on the floor string. After selecting a point along the string for the back point a series of guide points will be created along the selected line segment and the distance of the currently selected point from the survey station will be labeled. The back point position is dynamic and can be moved by simply left-clicking on a new position. Once the desired back point has been digitised right-click to enter the forward point selection. Select a forward point on the same side of the floor string as the back point. Like the back point, the forward point is dynamic and can be moved by left-clicking until in the desired position. Both forward and back points can be on one side of the selected survey station, or with one on either side of the station.
Once the two points have been digitised the Walls Mapping panel will be displayed.
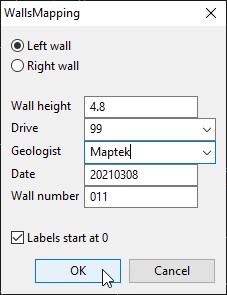
Left/Right wall
Allows the user to define whether the wall being mapped is on the left- or righthand side of the drive. When Left wall is selected the section will be created facing with the back point on the left-hand side of the screen and the forward point on the right-hand side of the screen. When Right wall is selected the section will be created facing with the forward point on the left-hand side of the screen and the back point on the right-hand side of the screen.
Wall height
The height of the wall – this will determine the height of the mapping template that gets built from the back and forward points.
Drive
The drive in which the mapping will be completed. This is a drop-down list populated from the corresponding settings in the FaceMappingConfig.xml file.
Geologist
The geologist performing the mapping. This is automatically populated based on the users’ login details.
Date
Todays’ date. This is automatically populated based on computer date settings.
Wall number
Which number walls map for the given drive is going to be mapped.
Labels start at 0
When selected, this will label the interval marks from the back point starting at zero and incrementing to the forward point at the defined unit distance in the
FaceMappingConfig.xml. When unselected, this will label the interval marks with their distance relative to the selected survey station.
Once the panel inputs are finalized and ‘OK’ is selected the tool creates a mapping template, creates a 3-point section view from the template and creates incremented measurements away from the selected station.
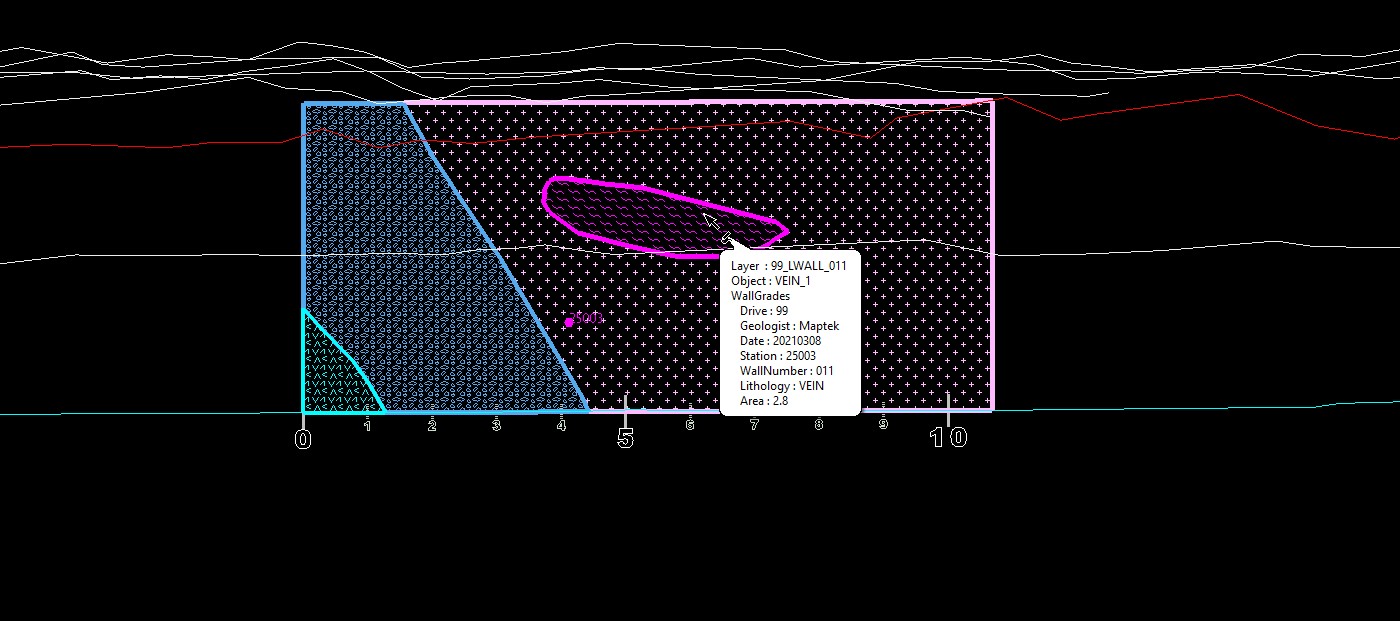
Feature Lines can be used to digitise lith boundaries, followed by Lines To Polygons to build mapping polygons. After this the Assign Attributes tool must be run to assign reference information to each of the polygons.