Import Surpac Triangulations
Instructions
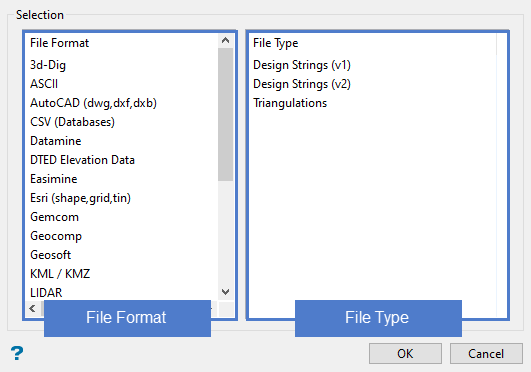
On the File menu, click Import.
Follow these steps:
-
Select the file format from the left column.
-
Select the file type from the right column.
-
Click OK.
-
Select to import either Single or Multiple files.
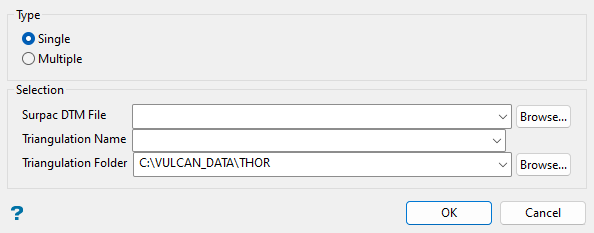
 Importing a Single Triangulation
-
Select the Surpac DTM File that you want to convert into a Vulcan triangulation. The drop-down list contains all (
.dtm) files found in the current working directory. Click Browse to select a file from another location. -
Enter a name for the new triangulation. You do not need to include the file extension.
-
Select the Triangulation Folder where the imported triangulation will be stored. By default, the top level of the current working directory will automatically be selected. Use the Browse button to save the triangulation in another location.
-
Click OK. The Triangulation Properties panel will be display.
-
Make any edits to the imported triangulation, then click OK.
Note: For information about the Properties panel, see Model > Triangle Files > Properties.
Importing Multiple Triangulations
-
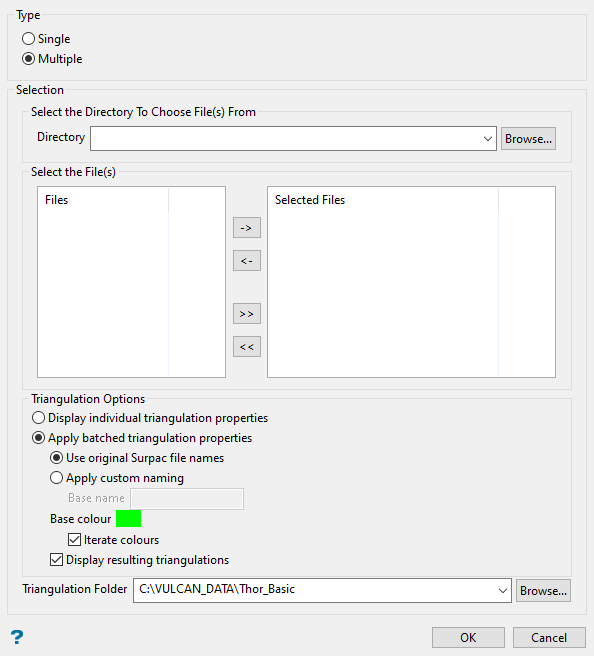
Select the directory that holds the files you want to import. If it is not located in the current working directory, click the Browse button to search for it.
-
Highlight the files you want to import in the left column. To highlight multiple list items at once, use the left mouse option in combination with the Shiftkey (this is for items that are adjacent in the list; for non-adjacent items, use the Ctrlkey and the left mouse option).
-
Move the items to the selection list on the right side of the panel.
-
Click the
 button to move the highlighted items to the selection list on the right.
 -
Click the
 button to remove the highlighted items from the selection list on the right.
 -
Click the
 button to move all items to the selection list on the right.
 -
Click the
 button to remove all items from the selection list on the right.
-
-
Select the Triangulation Options you want to apply.
Display individual triangulation properties - The Properties panel will be displayed for each imported triangulation, letting you customise them one at a time.
Apply batch triangulation properties - Define how the triangulations will be named and coloured here, then apply to all of them without opening the Properties panel.
Tip: This method is very useful if you have a lot of triangulations to import.
-
Select how you want to name the imported triangulations.
Use original Surpac file names - Files will be imported without the names being changed.
Apply custom naming - You will need to enter a Base name that will be used as a prefix. An underscore followed by a number will automatically be added to the prefix at the time of import.
If you enter a base name of
tri, then the resulting imported triangulations would be namedtri_0.00t, tri_1.00t, tri_2.00t, ...You can also select a single colour that will be used for all triangulations by clicking the Base colour icon, or choose to automatically apply a different colour to each triangulation by selecting Iterate colours.
-
Select Display resulting triangulations to load all the imported triangulations onto the screen after they have been imported.
-
Select the Triangulation Folder where the imported triangulation will be stored. By default, the top level of the current working directory will automatically be selected. Use the Browse button to save the triangulation in another location.
-
Click OK.
-
