Edit Attributes
This option allows for the editing of the attributes of multiple triangulations.
Overview
Attributes can be modified, deleted, renamed, and added. Attributes can be set to the value of other attributes or various intrinsic attributes (such as volume and surface area). They can also be set based on an expression, which can be a calculation based on existing attributes or intrinsic attributes.
Changes to triangulations will not be saved until the user explicitly selects the Save option, or Oks the panel. Additionally cancelling the panel or clearing modified triangulations from the grid will also query the user if they want to save any modified triangulations affected.
The selection of the triangulations to be edited can be done in a variety of ways. The following modes are available:
-
Preselection
-
Selection from the screen
-
Browsing
-
Selecting all in a folder with optional wildcards
-
Selection from a previously created selection file
Optionally, the selection can be filtered further by defining an expression based on the attributes of the triangulations themselves.
Instructions
On the Model menu, point to Triangle Attribute, then click Edit Attribute to display the following interface.
Note: If triangulations have been preselected by the user, they will be automatically loaded onto the Select specific triangulations grid.
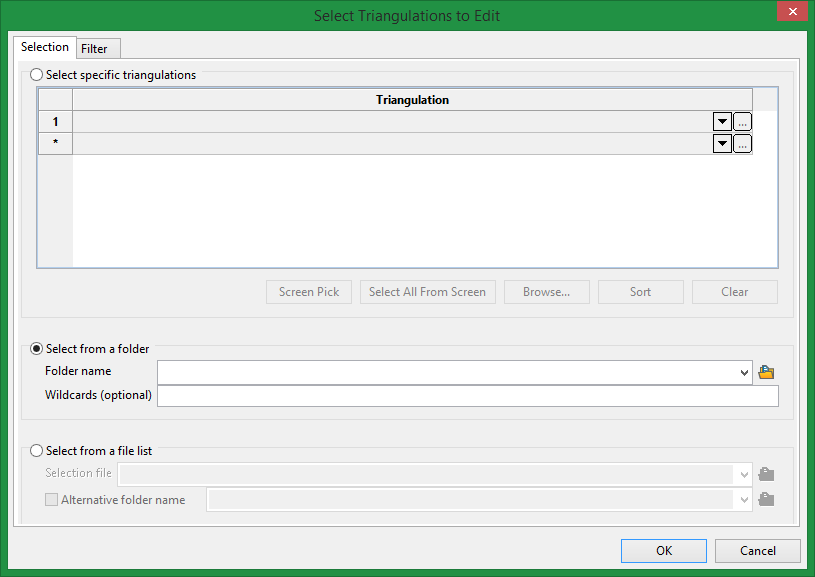
Select specific triangulations
You can manually enter names, or select from the drop list, or browse, or select from the screen for each row on the Triangulation grid.
Using the buttons below the grid, you can screen pick specific triangulations manually, or select all loaded visible triangulations, or browse for multiple triangulations. These selections will populate the Triangulation grid.
Select from a folder
Allows the user to take all or some triangulations from a single folder without the need to select all of them. By default, the extensions chosen for the triangulations are based on the user’s preferences. Any optional wildcards given will override the preferences. The wildcards are applied to the file names of the triangulations. The wildcards are standard Vulcan wildcards using an asterisk for 0 or more characters, and a question mark for a single character. Eg *co_1?_* If multiple wildcards are required, they need to be separated with semicolons.
Select from a file list
If you have created a selection file from another Vulcan option, you can use it to select the triangulations to load. Normally any relative paths in the selection file will be loaded from the project folder, but this can be overridden by setting the Alternative folder name entry.
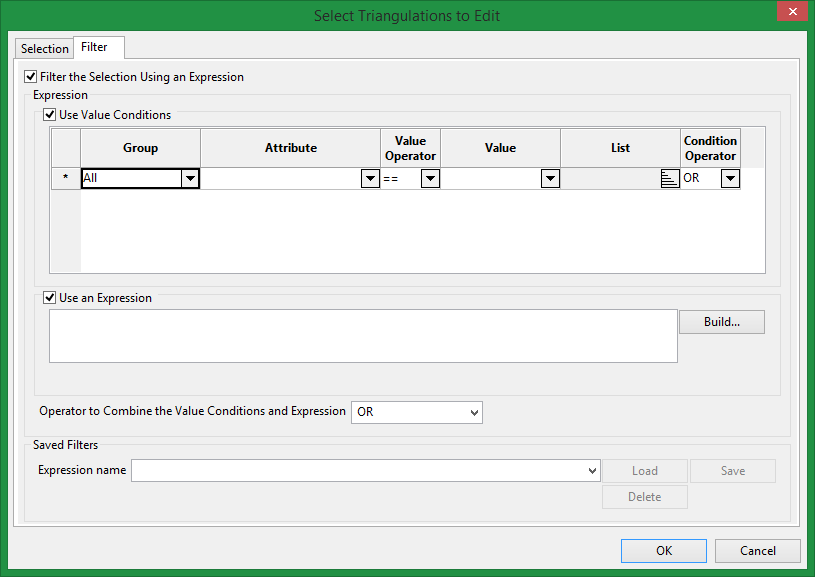
In addition to using the file name selection options, the user can further filter the list of triangulations by building a selection filter expression based on the triangulation attributes values.
An expression can be built from a combination of the Use Value Conditions grid and the Use an Expression entry based on the check boxes selected.
Use Value Conditions
This is a simple grid that allows an expression to be designed without needing to know the syntax of the expression.
Use an Expression
More complex expressions cannot be built with the simple grid above, so in that case the user will need to check the Use an Expression box and build the expression there. An expression Builder panel is available to help by clicking the Build button.
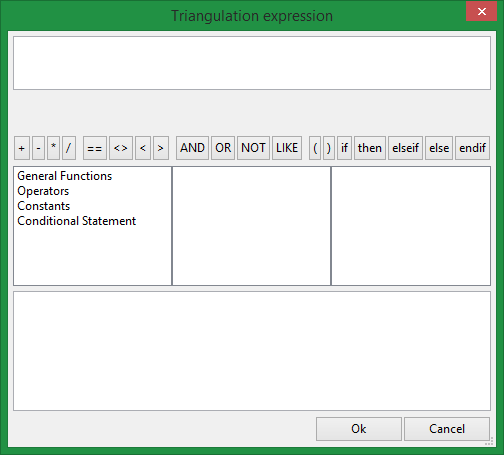
The Expression Builder panel is designed to help the user create an expression by:
-
Listing the available variables, functions and operators, along with their descriptions and examples of use. Double clicking on an item inserts the selected item into the expression
-
Listing the conditional statements that can be used. Double clicking on any of the combinations such as ‘if-then-else-endif’ will insert the statements into the expression ready for the user to enter the conditions and values
-
Checking the syntax of the current expression (the expression is displayed in red when invalid)
-
Various ‘intrinsic’ attributes of triangulations are available to be used in the expression. A description of each of them is shown in the bottom pane of the panel
-
Any of the attributes of the current triangulation are available to be used in the expression
Saved Filters
The user can load and delete filters used previously, and save new or update existing filters using the Saved Filters section. The file this is using is called TriangulationAttributeExpressions.spec which gets saved in the ENVIS_RESO folder.
The user will notice that the first time the Filter tab is moved to, and filtering turned on, the attributes will be read from the triangulations selected on the Selection tab. This is required so that the Filter tab can have its controls populated with the attribute names read from the chosen triangulations.
Once the selection is made, the triangulations are shown on the main panel.
This panel has several sections.
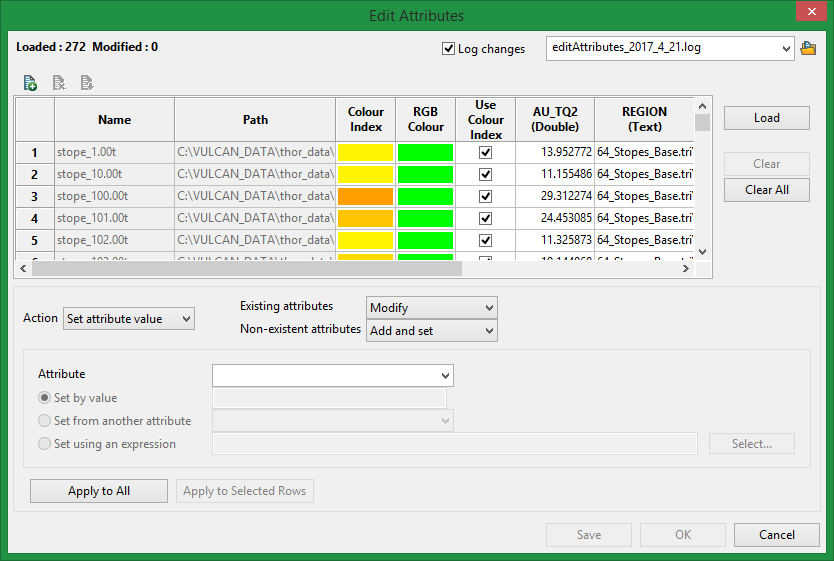
Top left
This section shows the current status. This shows the number of triangulations loaded, and how many have been modified.
Top right
This section allows the user to define a log file name and if they want a log produced. The log contains the changes made to each triangulation. The file is appended to if it already exists.
Attributes grid
This grid shows the loaded triangulations and all their attributes, including the colour information. The attributes are in alphabetical order left to right. Copying and pasting are allowed. Columns can be selected by clicking in the column headers, and rows can be selected by clicking in the row header at the left hand side.
The icons in the top left of the grid are for (in left to right order)
-
-
Defining a new attribute. No triangulation has the attribute until its value is set.
-
Deleting an attribute from all triangulations
-
Renaming an attribute on all triangulations
-
On the right hand side of the grid we have three buttons. From top to bottom
-
Load will load additional triangulations. Any new attributes found will be added to the right hand side of the existing grid in alphabetical order.
-
Clear will clear any selected rows. If any of the triangulations being cleared have been edited, the user will be asked if they want to save.
-
Clear All will clear everything from the grid. If any of the triangulations have been edited, the user will be asked if they want to save.
Actions
The following actions are available:
-
Set attribute value.
This allows the user to set the value of the selected attribute in a number of ways:-
Set by value. For each triangulation being modified, the single value entered is applied.
-
Set from another attribute. For each triangulation being modified, set the attribute using the value of another attribute. This has limitations as some types cannot be set to an invalid value for its type. For example a numeric attribute cannot be set to a string (unless the string can be interpreted as a number).
-
Set using an expression. For each triangulation being modified, the result of executing an expression is applied. The expression can be built from any existing user attributes or implicit attributes (such as volume or surface area), using mathematical or string functions. See below for more information on this option.
-
The user can define what happens based on whether the attribute being set exists in the given triangulation or not.
-
-
If the attribute exists already, the user can define if they want it modified or not.
-
If the triangulation does not have the attribute being set, it can be added automatically and set, or not added.
In other words, the user can choose to only modify existing attributes, or to only add new attributes, or do both and set the attribute on all triangulations irrespective of whether the triangulation had the attribute already or not.
Once the above is setup, to perform the action the user needs to select one of the Apply buttons. If the user has manually selected some rows on the main grid, then the Apply to Selected Rows button will be available to select. Selecting this will only consider the selected rows for modification. Alternatively selecting the Apply to All button will consider all of the loaded triangulations for modification.
-
-
Delete attribute.
This allows the user to delete the selected attribute from triangulations. If the user has manually selected some rows on the main grid, then the Apply to Selected Rows button will be available to select. Selecting this will only consider the selected rows when deleting the attribute. Alternatively selecting the Apply to All button will consider all of the loaded triangulations when deleting the attribute. -
Rename attribute.
This allows the user to rename the selected attribute. All loaded triangulations that have the attribute will be affected by this change. The new name entered cannot be the same as an existing attribute, and cannot have spaces or invalid characters or begin with a numeric character. -
Define new attribute.
This allows the user to define a new attribute which can be assigned to triangulations when its value is set. To define a new attribute you need the following:-
A new attribute name. The new name entered cannot be the same as an existing attribute, and cannot have spaces or invalid characters or begin with a numeric character.
-
A data type. Attributes need to be assigned a type. The available options are:
-
Boolean
-
Date
-
Double
-
Integer64
-
Text
-
-
Apply will define the new attribute and add a new column to the right side of the main attributes grid. Bear in mind that no triangulation has been updated at this stage. The attribute is only added when a value is assigned using the Set attribute value option.
Buttons
The buttons in the bottom right of the panel do the following:
-
Save
This button is only available when some triangulations have been modified. It will save the attribute changes to the triangulation files, and optionally generate the log entries of those changes. Once the save is complete, the panel will remain and further changes can be done. -
OK
This button is only available when some triangulations have been modified. It will save the attribute changes to the triangulation files, and optionally generate the log entries of those changes. Once the save is complete, the panel will close. -
Cancel
This button will cancel the panel. If any triangulations were modified, the user will be asked if they want to save those changes back to the triangulation files or not. Either way the panel will then be closed.
Select Assignment Expression
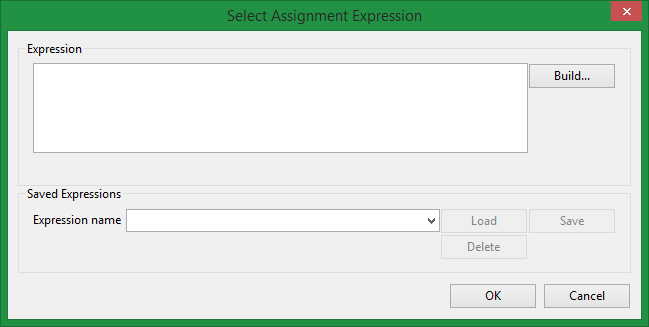
When setting an attribute value by an expression, choosing the Select button takes you to the Select Assignment Expression panel. Here you can manually enter an expression, select to build an expression using the Build button, load up a previously created assignment expression, and also perform other management tasks on the saved expressions stored in the TriangulationAttributeExpressions.spec specification file in the ENVIS_RESO folder.
As you enter the expression text in the Expression entry box, its syntax is constantly being checked and any errors are displayed just below the entry box on the left hand side.
