Import Geocomp Data
Instructions
On the File menu, click Import to display the Import panel.
Click Geocomp in the File Format column on the left.
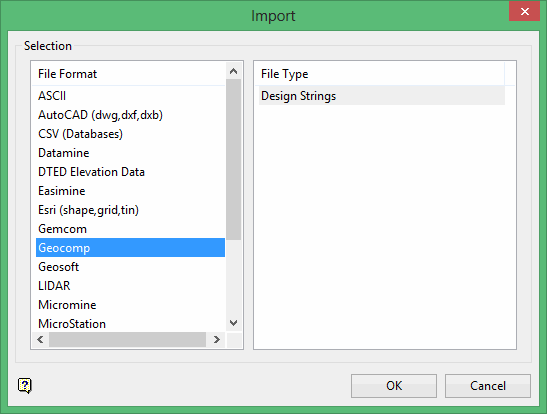
Select Design Strings from the File Type field on the right side of the panel.
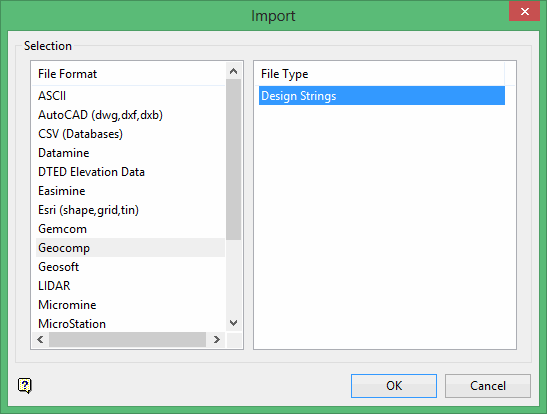
Click OK to display the Import Geocomp Selection panel.
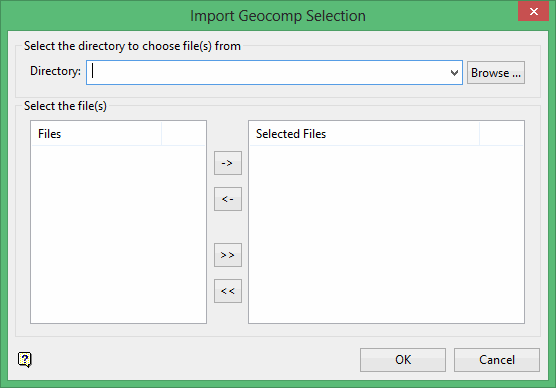
Select the Geocomp files that you want to import.
- To move a single file from one column to the other, click on the file name click the > or < button.
- To move all files from one column to the other, click the >> or << button.
- To move multiple files from one column to the other, hold the Ctrl key while clicking on the file names (or hold the Shift key to select a group of adjacent files). Once all the desired files are selected, click the > or < button.
Geocomp string data consists of two files; a .pts file containing point information and a .str file containing string information. This option will import both of these files. The point description from the .str file will be used as the point names for the imported objects.
Click OK.
The following panel is then displayed. This panel displays for each of the selected Geocomp files.

This section controls how the Geocomp data is to be split. The string data can either be split by using the data's entity code or its entity description. Each entity code/description will result in one object being formed when the data is imported into Vulcan.
Form strings
Select this check box to connect the line segments of neighbouring strings to form one continuous string. Each continuous string created will result in one separate object being formed when the data is imported into Vulcan.
If this check box is selected, then you will need to specify a snap tolerance. The line segments will only be linked together if their end points are in the specified tolerance distance.
Filter end points
Select this check box to omit the end point of the first object when connecting the line segments. If this check box is not selected, then the end point will be included.
We recommend that you select this check box when using a small tolerance where the end points for the strings are assumed to be coincident.
Save strings to a specific layer
Select this option to save the string data in a Vulcan layer. The drop-down list contains the names of all layers found in the currently open design database. If you select an existing layer, then the resulting data will be appended to the nominated layer. If you enter the name of an existing layer that is not currently loaded, then you will need to confirm whether you want to load the layer or replace it, that is overwrite its contents.
-
May contain up to forty characters.
-
Must begin with an alphanumeric character [0-9] or [a-z].
-
Cannot include spaces.
-
Can include hyphens [ - ], plus signs [ + ], underscores [ _ ], periods/dots [ . ].
-
Name layer based on entity code
Select this option to save the string data in a Vulcan layer that is named according to the entity code.
Layer description
Enter a description to further describe the contents of this layer. The description can be up to 80 alphanumeric characters and may include spaces. If a description is not entered, then a default description will be used instead. If the chosen layer already has an assigned description, the description displays when the layer is selected. Existing layer descriptions can be overwritten.
Click OK.
