Import Micromine Data
Instructions
On the File menu, click Import to display the Import panel.
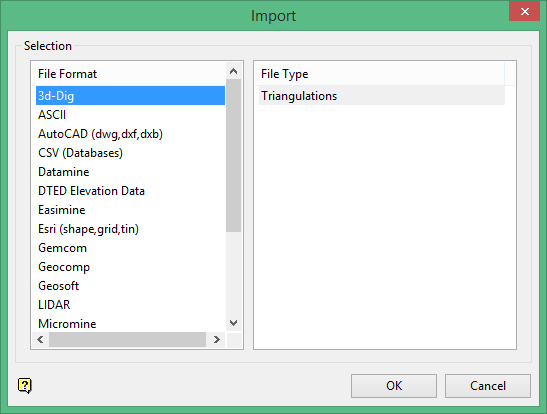
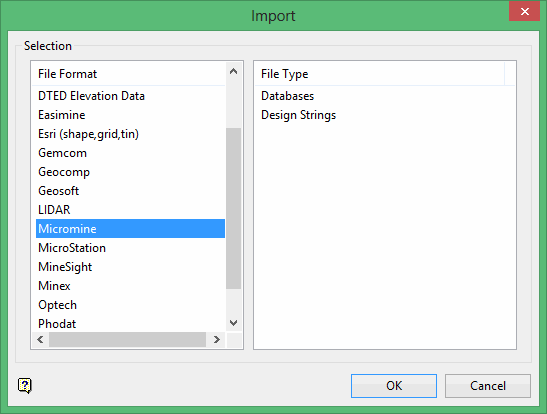
Click Micromine in the File Format column on the left.
Select Design Strings from the File Type field on the right side of the panel.
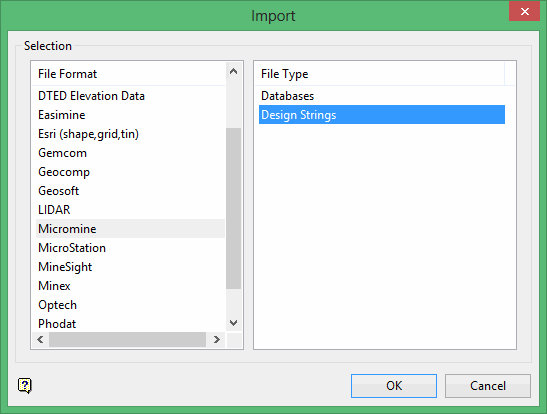
Click OK to display the Import Micromine String panel.
This panel consists of two tabbed sections:
Selection tab
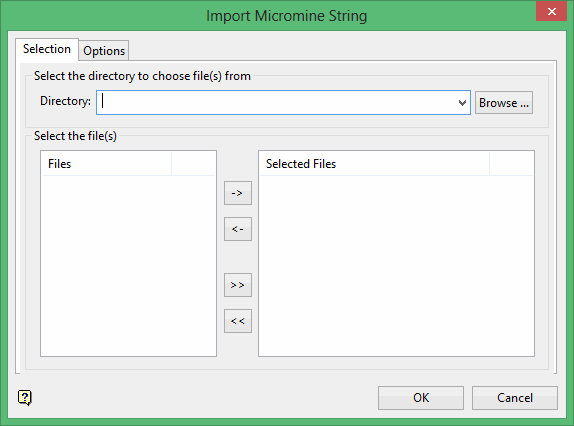
Select the Micromine files (.str) that you want to import.
-
To move a single file from one column to the other, click on the file name click the > or < button.
-
To move all files from one column to the other, click the >> or << button.
-
To move multiple files from one column to the other, hold the Ctrl key while clicking on the file names (or hold the Shift key to select a group of adjacent files). Once all the desired files are selected, click the > or < button.
Options tab
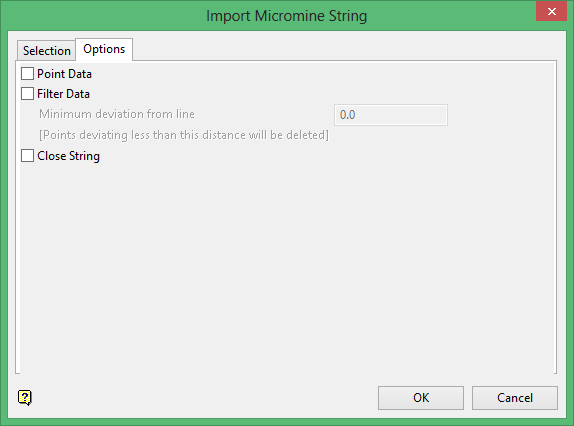
Point Data
Select this check box to import the data as points rather than as connected lines.
Filter Data
Select this check box to reduce the number of points being imported. The points are filtered according to the specified variation (deviation). Refer also to Design > Object Edit > Filter.
Close string
Select this check box if you want the strings to be automatically closed.
Click OK.
The following panel is then displayed.
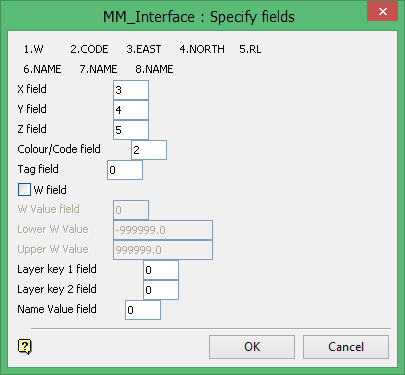
The chosen file will be used to populate the Specify Fields panel. The top section of this panel contains all of the fields and field numbers stored in the Micromine file. Use this section to complete the remainder of the panel. Vulcan will enter default field numbers based on the Micromine field names.
X field
Enter the field number of the X coordinate of the data (numeric only).
Y field
Enter the field number of the Y coordinate of the data (numeric only).
Z field
Enter the field number of the Z coordinate of the data (numeric only).
Colour/Code field
This is an optional field for the number of the colour (numeric only). If the colour field number is valid, then each change in the value of this field will result in a new layer being created.
Tag field
This is an optional field for the number of the tag. The number may be alphanumeric. If the tag field number is valid, then a change in the value will result in a new object.
W field
Select this check box to restrict the W values to be imported. You are then required to specify the field number of the W value as well as the upper and lower values.
Layer key 1 and 2 field
These are optional field numbers for the layers. The numbers may be alphanumeric. If the layer key field numbers are valid, then a change in the value will result in a new layer.
Name Value field
This is an optional field for the number of the name. The number may be alphanumeric. By specifying a valid name field number, each point will have a name associated with it.
Click OK.
The following panel is then displayed.

If the Layer key 1 and 2 fields have been entered (through the previous panel), then those layer names are displayed in this panel. If these fields have not been entered, all objects will be placed into one layer. The default layer name, which can be overwritten, is '001_001.'
Once the maximum number of objects per layer has been reached, a new layer is started with the default layer name incremented by one, for example '002_002.'
Click OK.
