Display by Colour
Use this option to load and remove or change the visibility of triangulations based on their colour. This feature is useful for quickly focusing on triangulations of interest or hiding extraneous triangulations.
Instructions
On the Model menu, point to Triangle Files, then click Display by Colour.
Follow these steps:
-
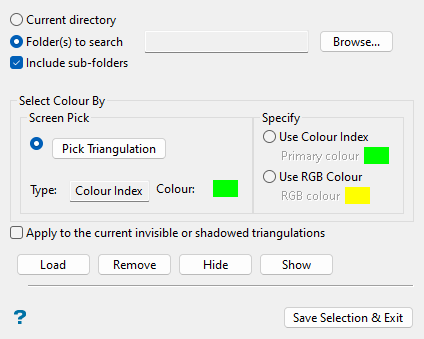
Specify the folder location where triangulations of interest are located by selecting either Current directory or browsing to another location using the Folder(s) to search option:
-
Current directory: Select this option to evaluate the triangulations present in your current working directory.
-
Folder(s) to search: Select this option to select specific folder locations where you want to evaluate triangulations. To change or add folders, click Browse... to display the following selection panel.
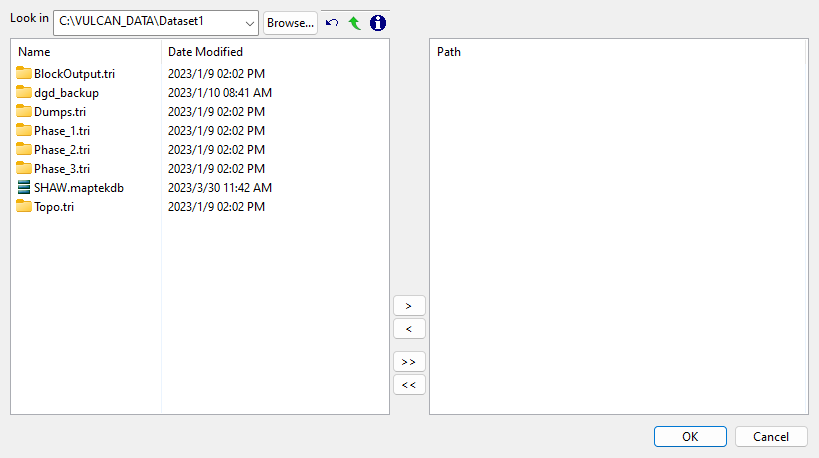
Select the desired folder(s) from the list, which shows all available folders in the current working directory. You can select folders from a different location by clicking Browse..., or use the
 buttons to go to the last folder visited, go up one level, or change the way details are viewed in the panel, respectively.
To highlight multiple list items at once, use the left mouse option in combination with the Shiftkey (this is for items that are adjacent in the list; for non-adjacent items, use the Ctrlkey and the left mouse option).
Move the items to the selection list on the right side of the panel.
- Click the
 button to move the highlighted items to the selection list on the right.
 - Click the
 button to remove the highlighted items from the selection list on the right.
 - Click the
 button to move all items to the selection list on the right.
 - Click the
 button to remove all items from the selection list on the right.
Click OK to add the selected folder locations and return to the main panel.
- Click the
-
-
Select the Include sub-folders checkbox if you would like to include triangulations in sub-folders of the folder location(s) selected in the previous step.
-
Choose how to select the triangulation colour of interest through either the Screen Pick or Specify options:
-
Pick Triangulation: Select this option under the Screen Pick section to choose a colour from an existing triangulation. When you click the Pick Triangulation button, you will be prompted to select an on-screen triangulation to choose the associated colour. The selected triangulation's colour type and colour will appear in the panel. Colour Index type refers to a colour available in the colour index palette, and RGB type refers to a colour available in RGB colour options.
Note: At least one triangulation must be loaded on-screen to use this method of colour selection.
-
Use Colour Index: Select this option to specify the triangulation colour from the colour index palette. Click the Primary colour box to make a selection from the displayed palette.
-
Use RGB Colour: Select this option to specify the triangulation colour from the RGB colour options, which include a wider range of colours than the colour index palette. Click the RGB colour box to make a selection from the displayed RGB colour options panel.
-
-
Select the Apply to the current invisible or shadowed triangulations checkbox to ensure that Load or Remove operations apply to all on-screen triangulations, not just those that are visible.
-
To make subject triangulations of the selected colour available or unavailable on-screen, click Load or Remove. To make them visible or invisible, click Show or Hide.
-
Click Save Selection & Exit to retain the current display of triangulations and close the panel.
