Report Reserves
Report Reserves
Use the Report Reserves option to calculate the reserves for those polygons currently selected (shown in red). Once calculated, their colour changes to green.
Existing green polygons are ignored. If no polygons are selected (that is white) or they are all green, then this option attempts to calculate reserves for the entire area covered by each horizon. Since this may be time consuming, particularly if no crop lines have been specified, you are asked for confirmation before the calculation starts.
Instructions
On the Rsvute menu, point to Reserves, and then click Report Reserves to display the Report Reserves panel.
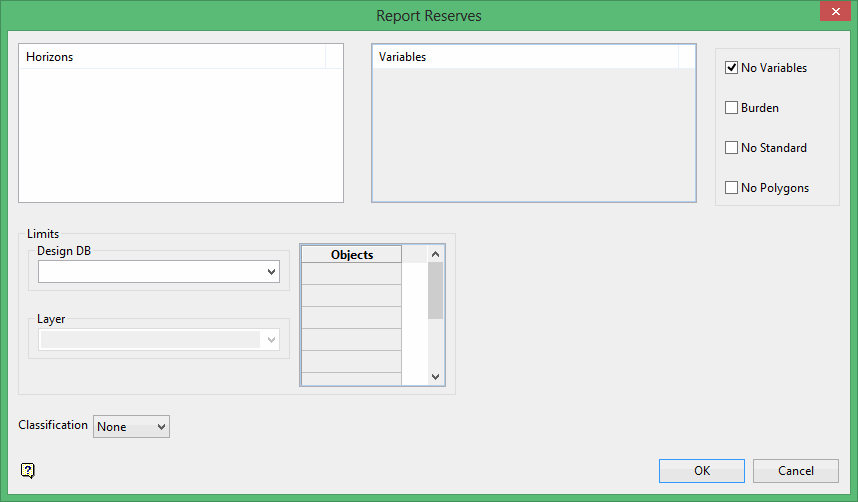
Horizons
This section contains a list of horizons. Select the horizons to be reported. Standard windows selection methods apply, such as Shift + click to select adjacent horizons and Ctrl + click to select non-adjacent horizons. You can also right-click in the section and click Select all. Only the selected horizons are reported. Rsvute still acknowledges that the other horizons exist, and hence the burden values are not affected by this list. If no horizons are specified, then all known horizons are reported.
Variables
This section contains a list of variables. Select the variables to be reported, for example OB, MD, AS, SU etc. Standard windows selection methods apply, such as Shift + click to select adjacent variables and Ctrl + click to select non-adjacent variables. You can also right-click in the section and click Select all. Each variable corresponds to a grid. If the grid for a particular horizon/variable combination does not exist, a set of "...." will appear on the report instead of a value. If no variables are specified, then all known variables are reported.
Note: If a variable does not appear in the list, it has not been defined in Grid Calc.
No Variables
Select this check box if you don't want variables to be reported and want a report solely on area and volume.
Burden
Select this check box if you want Rsvute to derive the overburden and interburden values. Rsvute does this by comparing the surfaces that make up each horizon, checking for overlap and volumes between each pair. In addition to the volumes, stripping ratios are also reported.
Note: Because of the cell by cell checks and calculations required, selecting this check box will considerably slow the Rsvute execution time. If burden values are required on a report, it is much faster to calculate OB and MD (overburden and midburden) grids and report on these directly.
No standard
Select this check box if you want to report on user defined variables. Standard coal variables are not reported when this option is ticked.
No Polygons
Select this check box if you want to ignore the limiting polygons listed in the horizon table.
Limits
This section allows you to specify additional limit polygons. These limit polygons are applied to each horizon equally and apply an overall limit to the reserve data. It can be used to generate reserves for a given lease or property section.
Note: When specifying limits in the Report Defaults and the Report Reserves panels, you must keep in mind the effects the limits will have on the reserving process. Polygons within a limit layer are INTERSECTED and each polygon acts as a new limit. Polygons made in Grid Calc, through the Contour option, and used in the Report Defaults and Report Reserves panels, should be created as "single polygons" so that invisible bridges will exist between the inclusive and exclusive contours. All variables are limited by these polygons. Reserves are only reported within the active areas.
Design DB
Enter, or select from the drop-down list, the name of the design database containing additional limit polygons.
Layer
Specify the layer that contains the additional limit polygons (wildcards are allowed). Specify the object (polygon) names (wildcards allowed).
Classification
Reserves can be broken down by the three classification (distance) methods:
- Measured
- Indicated
- Inferred
You can choose a single classification, all or none. If all classifications are requested, then the hypothetical reserves are also determined and reported.
Note: In order for the classifications option to run, the.map files generated through the modelling process must be located within the current working directory. These files will be used to determine the distances of the reserves from the drillholes.
Click OK.
Press the Esc key to stop the reserve calculation.
