DGD and Layer
This section to select the layers containing the objects that will be used to create the survey triangulation.
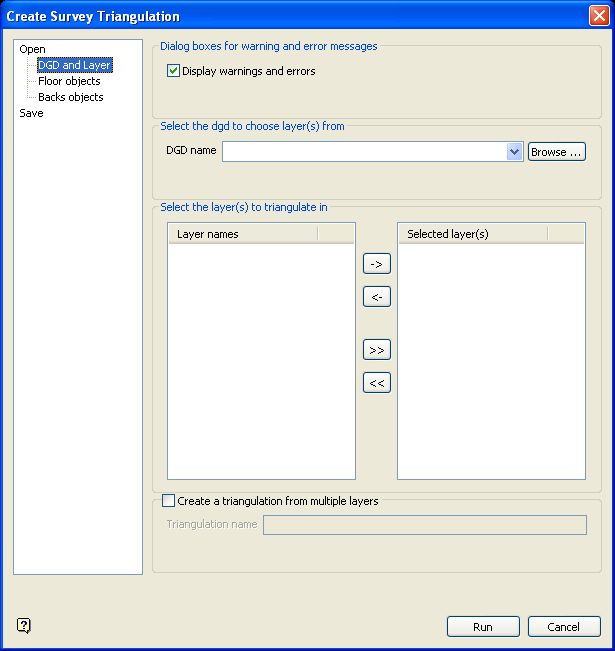
DGD and Layer panel
Display warnings and errors
Select this check box to display warning and error messages whenever faults are found in the selected the survey data.
DGD name
Select the design database containing the layers that you want to select.
Select the layer(s) to triangulate in
Select the necessary layers, that is, the layers that contain the objects that you want to triangulate.
- Press the
 button to move highlighted files to the selection list on the right side. The layers in this list will be used to created the survey triangulation(s) once the Run button has been selected. Pressing the
  button will move all files displayed in the left-hand side to the right side.
 - To remove files from the selection list, highlight the desired files and press the
 button. Use the
  button to remove all files from the selection list.
Create a triangulation from multiple layers
Select this check box to create a single triangulation using the data contained in the nominated layers. All objects that match the selected group codes, which are specified through the Floor objects and Back object sections, will be used to construct the triangulation. The resulting triangulation will be stored in your current working directory.
If this check box is not checked, then a separate triangulation will be created for each of the chosen layers. The triangulation will be named after its corresponding layer.
Run
Use the Run button to create the triangulation. To display the triangulation, open the Triangulation folder in the Data tab and load the corresponding.00t file.
Once complete, go to the Floor objects section to load the Floor and Wall objects.
- Create Survey Triangulation interface
-
- Load or create new specification file
- DGD and Layer
- Floor objects
- Back objects
- Save
